Purpose:
This guide helps ToolSense admins roll out the platform cleanly across regions, subsidiaries, and teams. By designing the right group structure, you ensure correct user access, asset visibility, and long-term scalability.
Key Principle:
Only groups control visibility of assets, tickets, and sites.
Do not confuse this with the Teams feature, which is used only for ticket assignments and notifications.
 Step 1: Understand the Basics
Component | What it does | Notes |
Groups | Define organizational structure and visibility | Used to build hierarchy and access levels |
Sites | Represent physical locations or contracts | Assigned to groups |
Assets | Assigned to a site or directly to a group | Inherits access from group |
Users | Can be assigned to one group only | See that group + sub-groups |
Groups are the only mechanism for segmenting visibility in ToolSense.
Sites and assets must be assigned correctly within the group tree for users to see them.
Not every group needs a user.
You can create intermediate groups purely for organizing related groups (e.g. “North Regional Managers”).
 Step 2: Plan Your Group Structure
Start by sketching your company's real-world structure and map it into groups:
 Best Practice: Facility Management (FM)
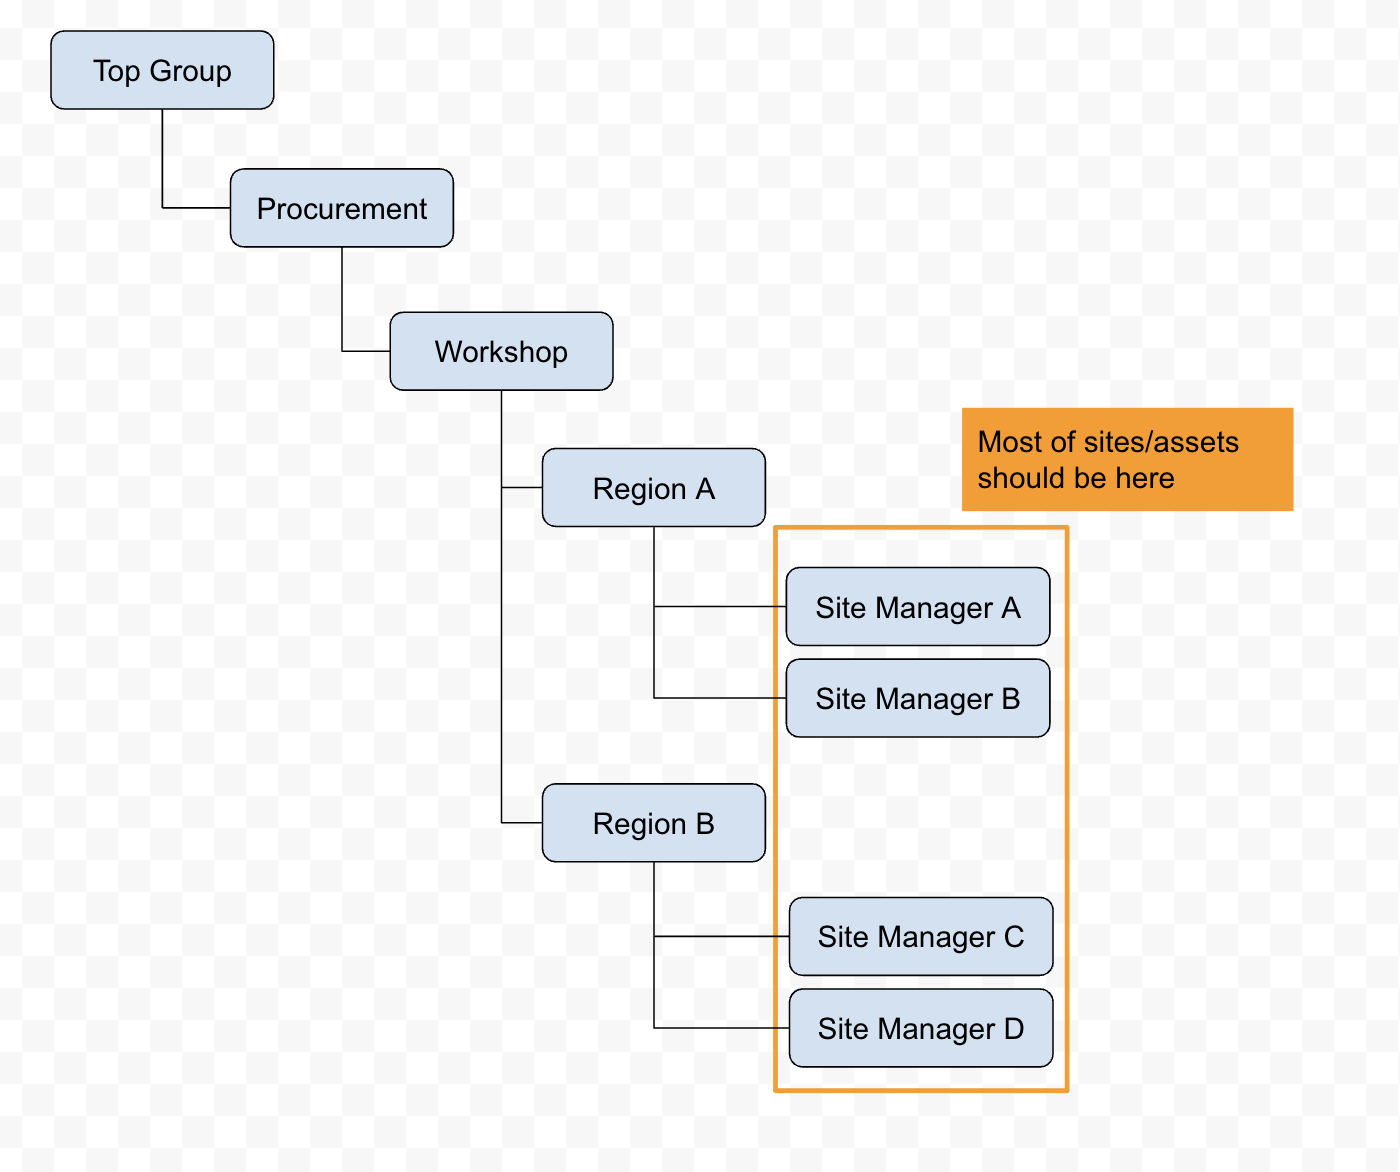
Sites = Cleaning contracts (e.g., “City Hospital – Standard Cleaning”, “City Hospital – Window Cleaning”)
Don’t create one group per site
Sites with same physical name are fine if they reflect different contracts or access scopes
If assigned to higher-level groups (e.g., Workshop), users below (e.g., Site Managers) won't see anything
Best Practice: Construction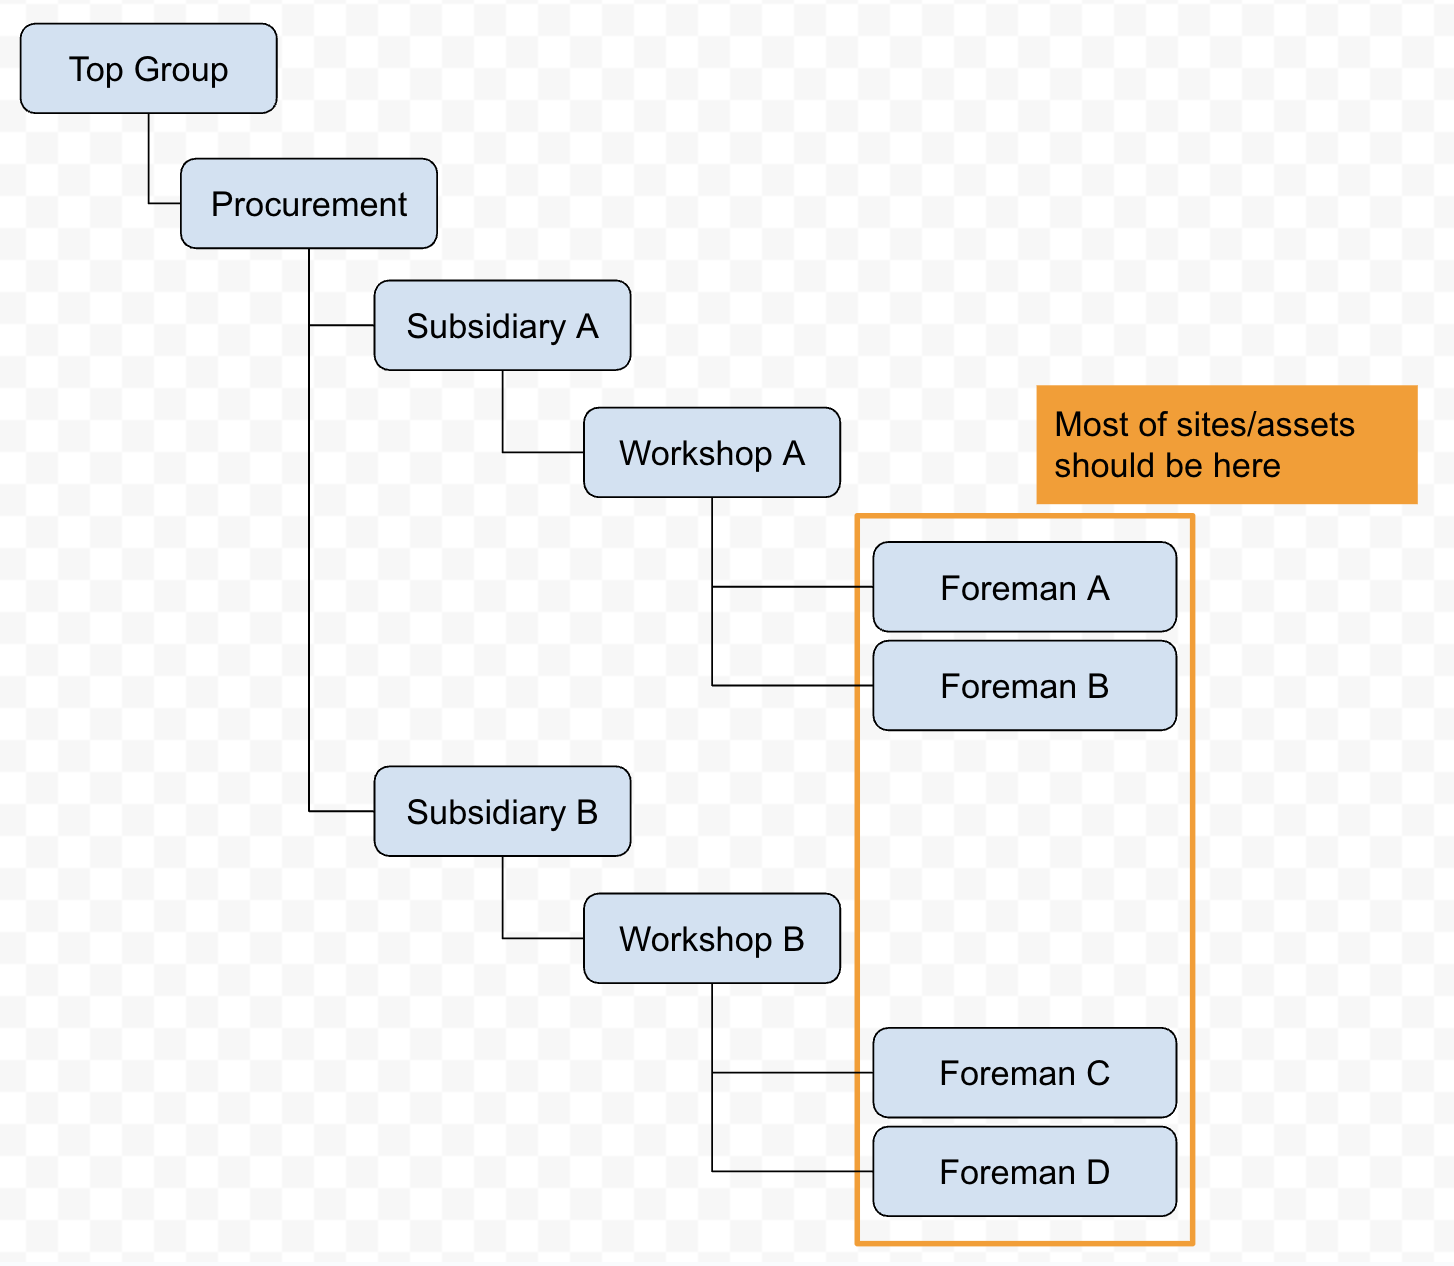
Sites = Construction projects (e.g., “Project X – Earthworks”)
Groups represent subsidiaries, tech units, and foremen
 Step 3: Create Groups in ToolSense
Go to Admin Panel → Groups
Click + Add Group
Build the hierarchy top-down
Use intermediate groups (e.g., “North Region”) even without users if needed to structure large accounts
 Step 4: Create Sites
Go to the Sites menu
Use “+ Add Site” or Excel import
Assign each site to the lowest group level responsible for it
 Step 5: Assign Assets
Prefer assigning assets to sites
Site → inherits group
Or assign assets directly to a group if no site is needed
Rules:
Assets should live in the lowest group level (e.g. Site Manager or Polier group)
No asset can be assigned to Site A (in Group A) and also appear in Group B
Avoid assigning everything to high-level groups (users below won’t see anything)
 Step 6: Assign Users
Go to Users
Assign each user to one group
They get access to everything in that group and below
You cannot:
Assign users to multiple groups
Assign users to specific sites or assets
Best Practices Summary – Group Structure in ToolSenseUse groups to structure visibility and access – this is the only way to control what users can see.
Assign sites and assets to the lowest-level group where the responsible users sit to ensure proper access.
Create intermediate group levels (e.g., “North Region”) to organize sub-groups, even without assigning users there.
Only create a user-specific group if a person is responsible for a defined set of assets and should only see those — otherwise, avoid naming groups after users to prevent confusion.
Use groups to reflect roles, teams, or geographic units, not physical locations.
Reuse site names with contract-specific distinctions (e.g., “School A – Standard Cleaning” vs. “School A – Window Cleaning”).
Build the group hierarchy top-down and think ahead to support future scaling.
Match your ToolSense structure to your real-world organization (e.g., subsidiaries, workshops, regional leads).
Assign users to the group that reflects their visibility needs — they will see all data from that group downward.
Keep the Teams feature separate — use it only for ticket assignments and notifications, not for visibility or group structuring.
 Need Help?
Still unsure? Reach out to your ToolSense Customer Success Manager.