This article will guide you through how to create internal groups and customer groups. If you want to learn more about the differences between those two, please refer to the article below
Understanding Groups: Internal vs. Customer Groups
Learn about the Differences and Use Cases of each Group Type
Starting the Process
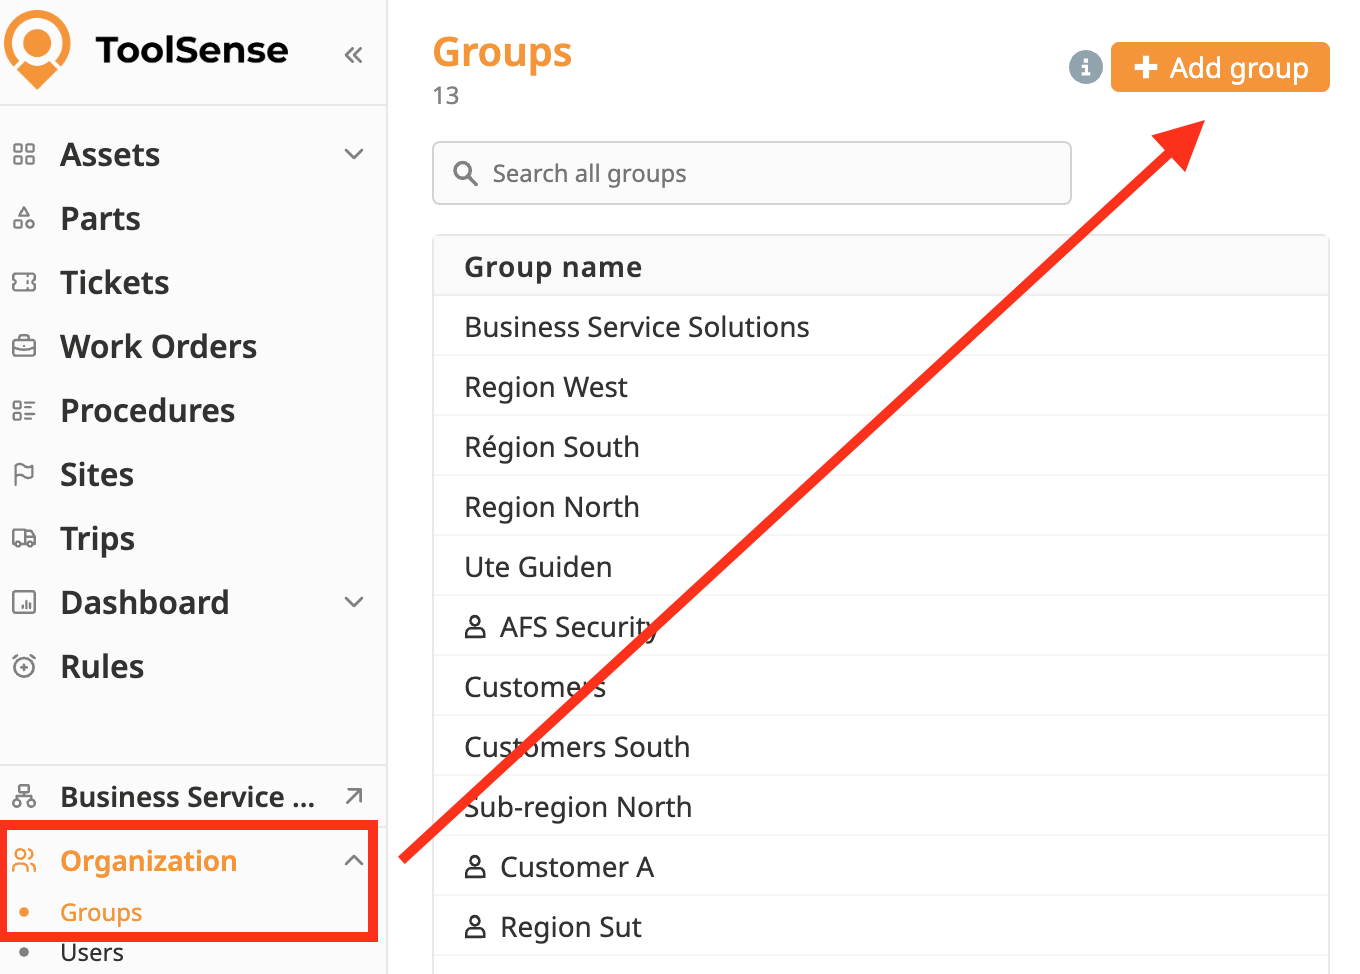
Navigate to the "Organization Menu" and select "Groups."
Click on the Add Group button.
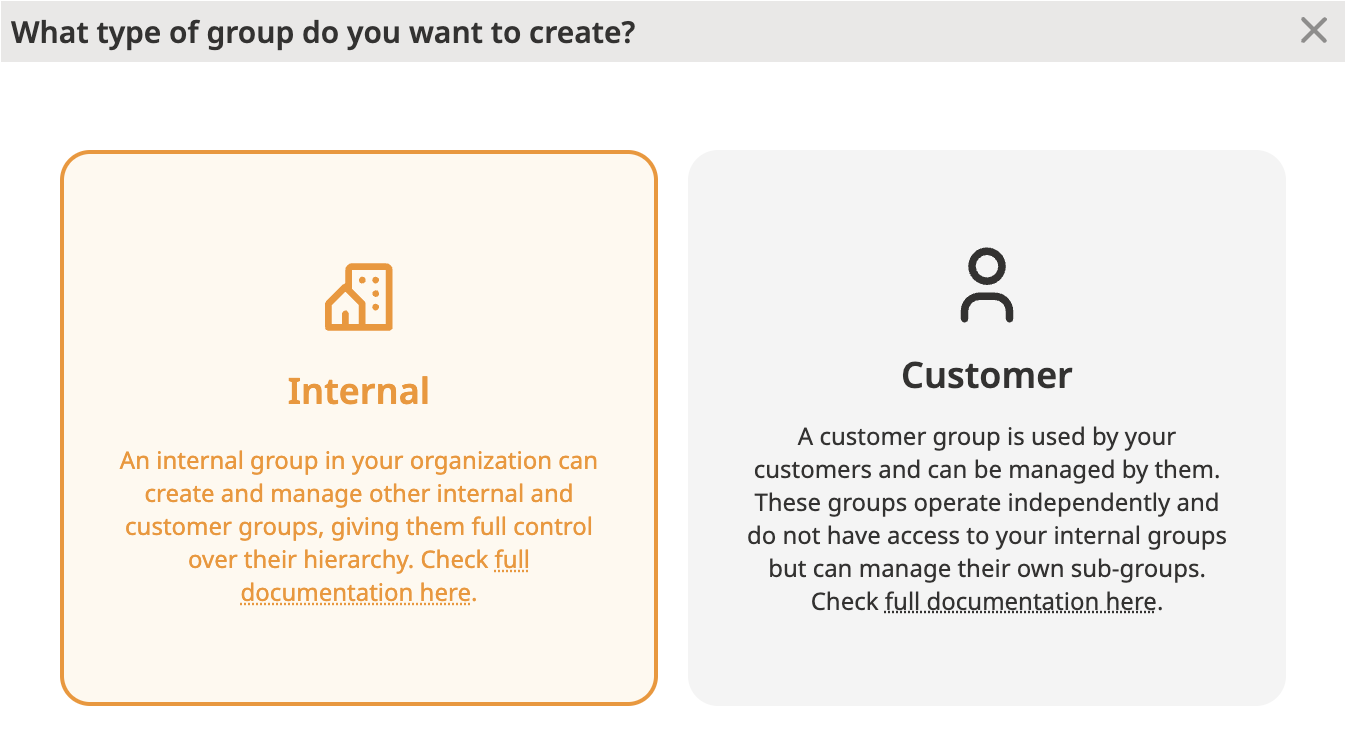
A modal will appear, prompting you to choose the type of group you want to create: Internal or Customer.
Filling in Details
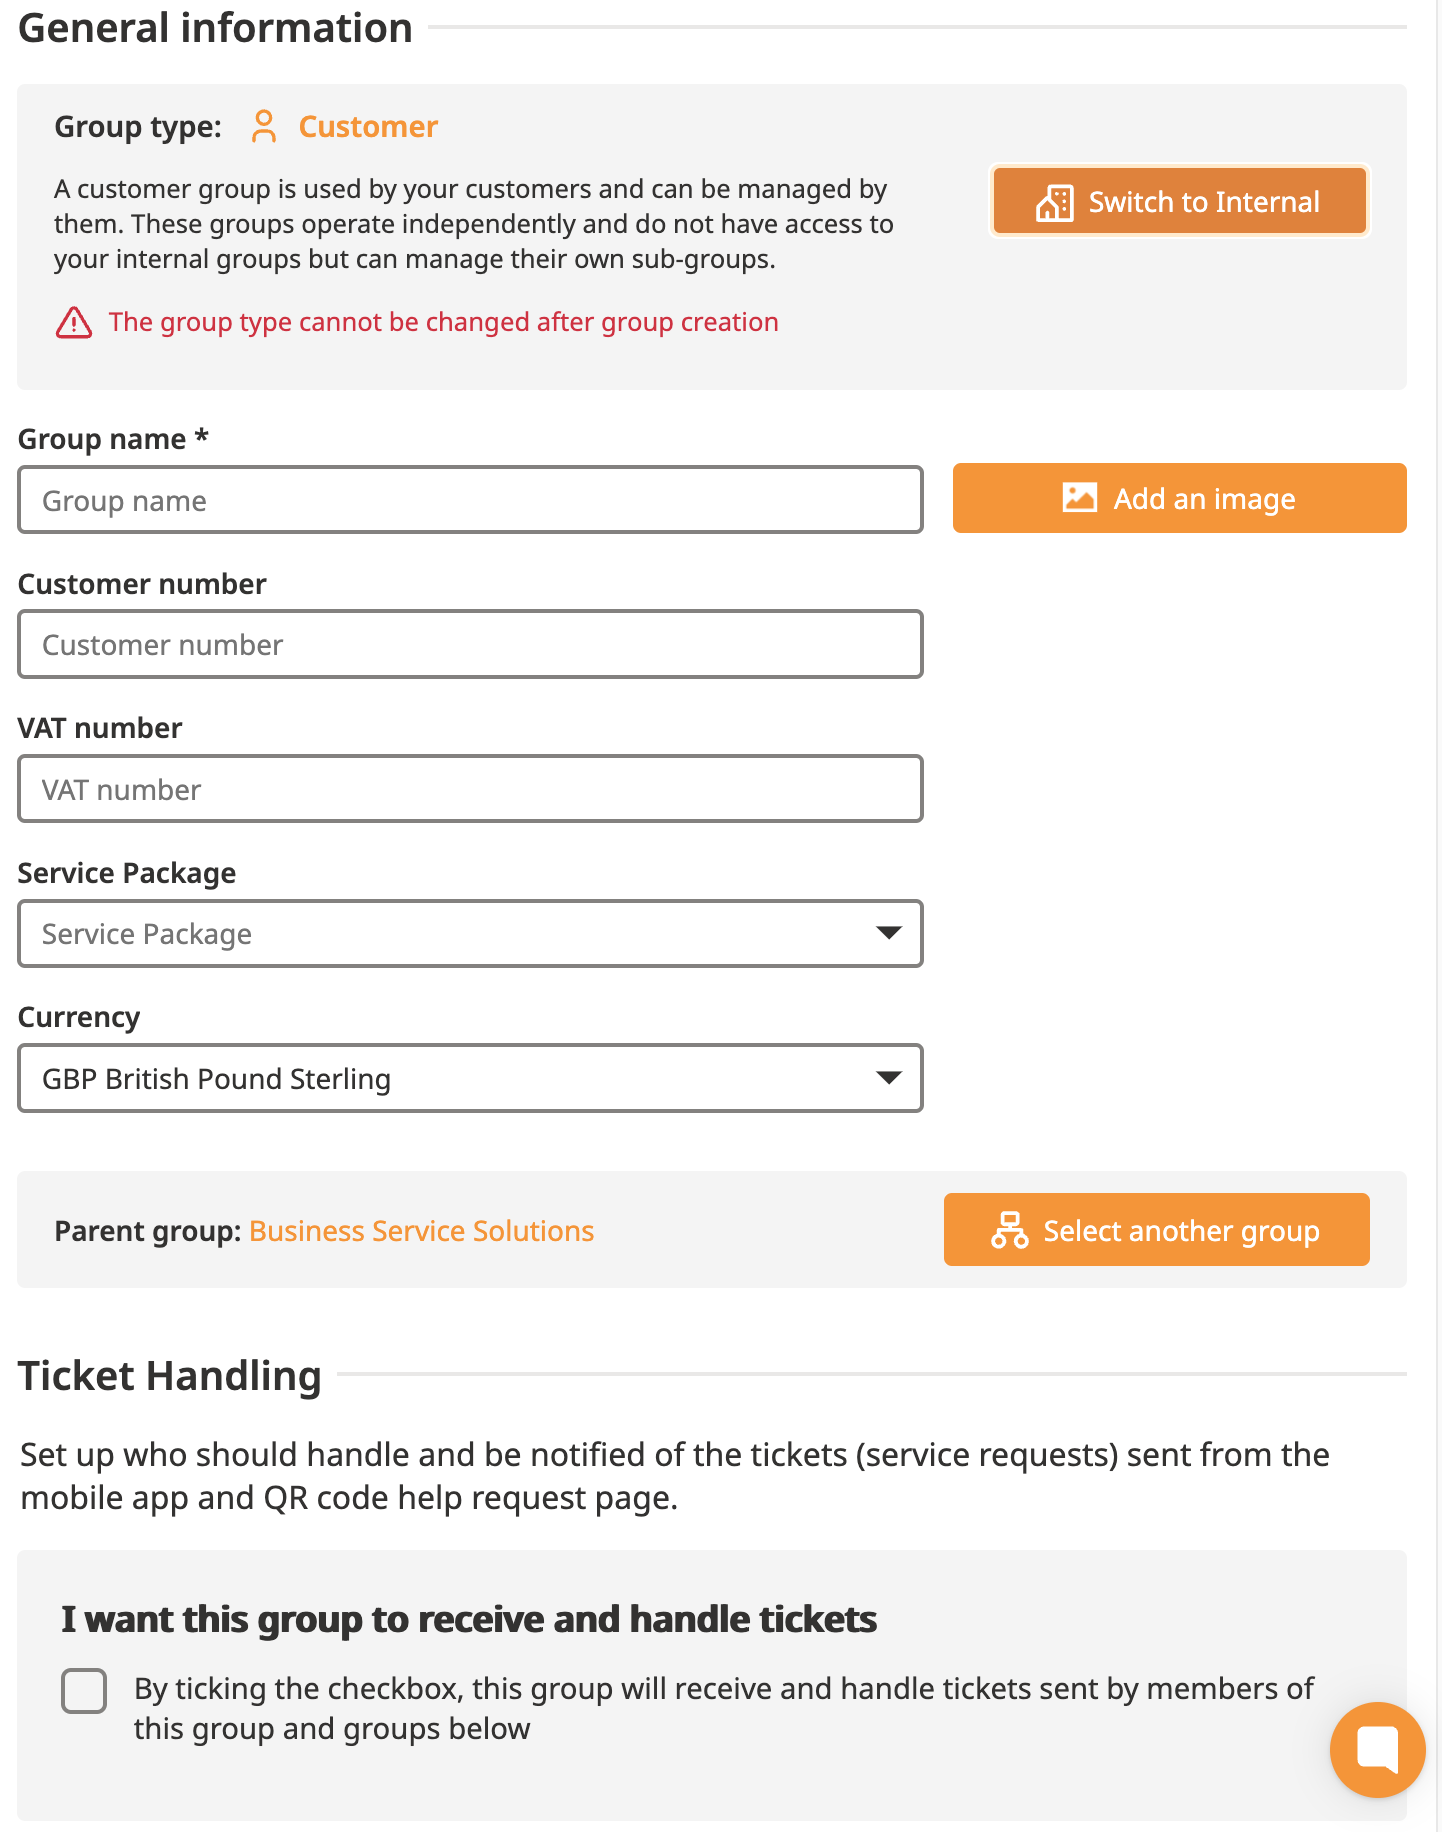
Group Name: Enter a name that clearly represents the purpose of the group.
Image (Optional): Add an image to visually represent the group if needed.
Service Package: Automatically inherited from the parent group or the nearest group in the hierarchy with a service package.
Currency: Specify the currency used by the group.
Group Assignment: By default, the group is assigned to your current group. You can reassign it to another visible group (customer groups will be greyed out).
Ticket Handling: Define who should handle and be notified about service requests submitted via the mobile app or QR code help page.
Customer Groups have 2 additional options:
Customer Number
Customer VAT Number
Finalizing Creation
Click the "Save" button once all fields are completed.
A success message will appear, confirming that the group was created.
You will be redirected to the group’s Overview tab, where you can manage further settings.
While the group types - Internal or Customer - cannot be changed after creation, other details can be modified.
To edit a group:
Navigate to the "Groups" menu.
Select the group you want to edit.
Update fields such as the group name, assignment, or other editable attributes.
Save your changes.