This article will try to help you go through the necessary steps in order to make a successful driver authentication integration on your car or any kind of machinery.
Keep in mind that his integration will most likely require some technical knowledge. Cutting and connecting wires, understanding schematics and making some simple measurements with a multimeter.

On a successful integration and once everything is properly set up on the platform the installation will work the following way.
The two possibilities are that either an unauthenticated personnel will try to use the vehicle/machine or one who is actually allowed.
In case of the latter, nothing really happens, the user will not get any confirmation that the authentication was successful other than the buzzer staying silent in case it's wired up.
Should an unauthorised person try to use the machine, a remote command will be sent to the device activating one if it's outputs along with the buzzer wired up to it. The buzzer will light up red and make a loud beeping noise.
This will continue until a successful authentication, or until the device is shut off, depending on how the buzzer was wired up (more on this in a later section).

This process will not work at places with no reception, like underground garages and similar.
The machine will function without any problem, but once it gets a proper signal, the authentication process will resume and the buzzer gets activated/deactivated.
For ease of connecting wires together you can use Wago clips, but anything similar will suffice.
You will need a wire cutter of some sort
A tool to blank the wires (knife, specific device or tool for this purpose)
Screwdriver
You will of course need the hardware provided by ToolSense.
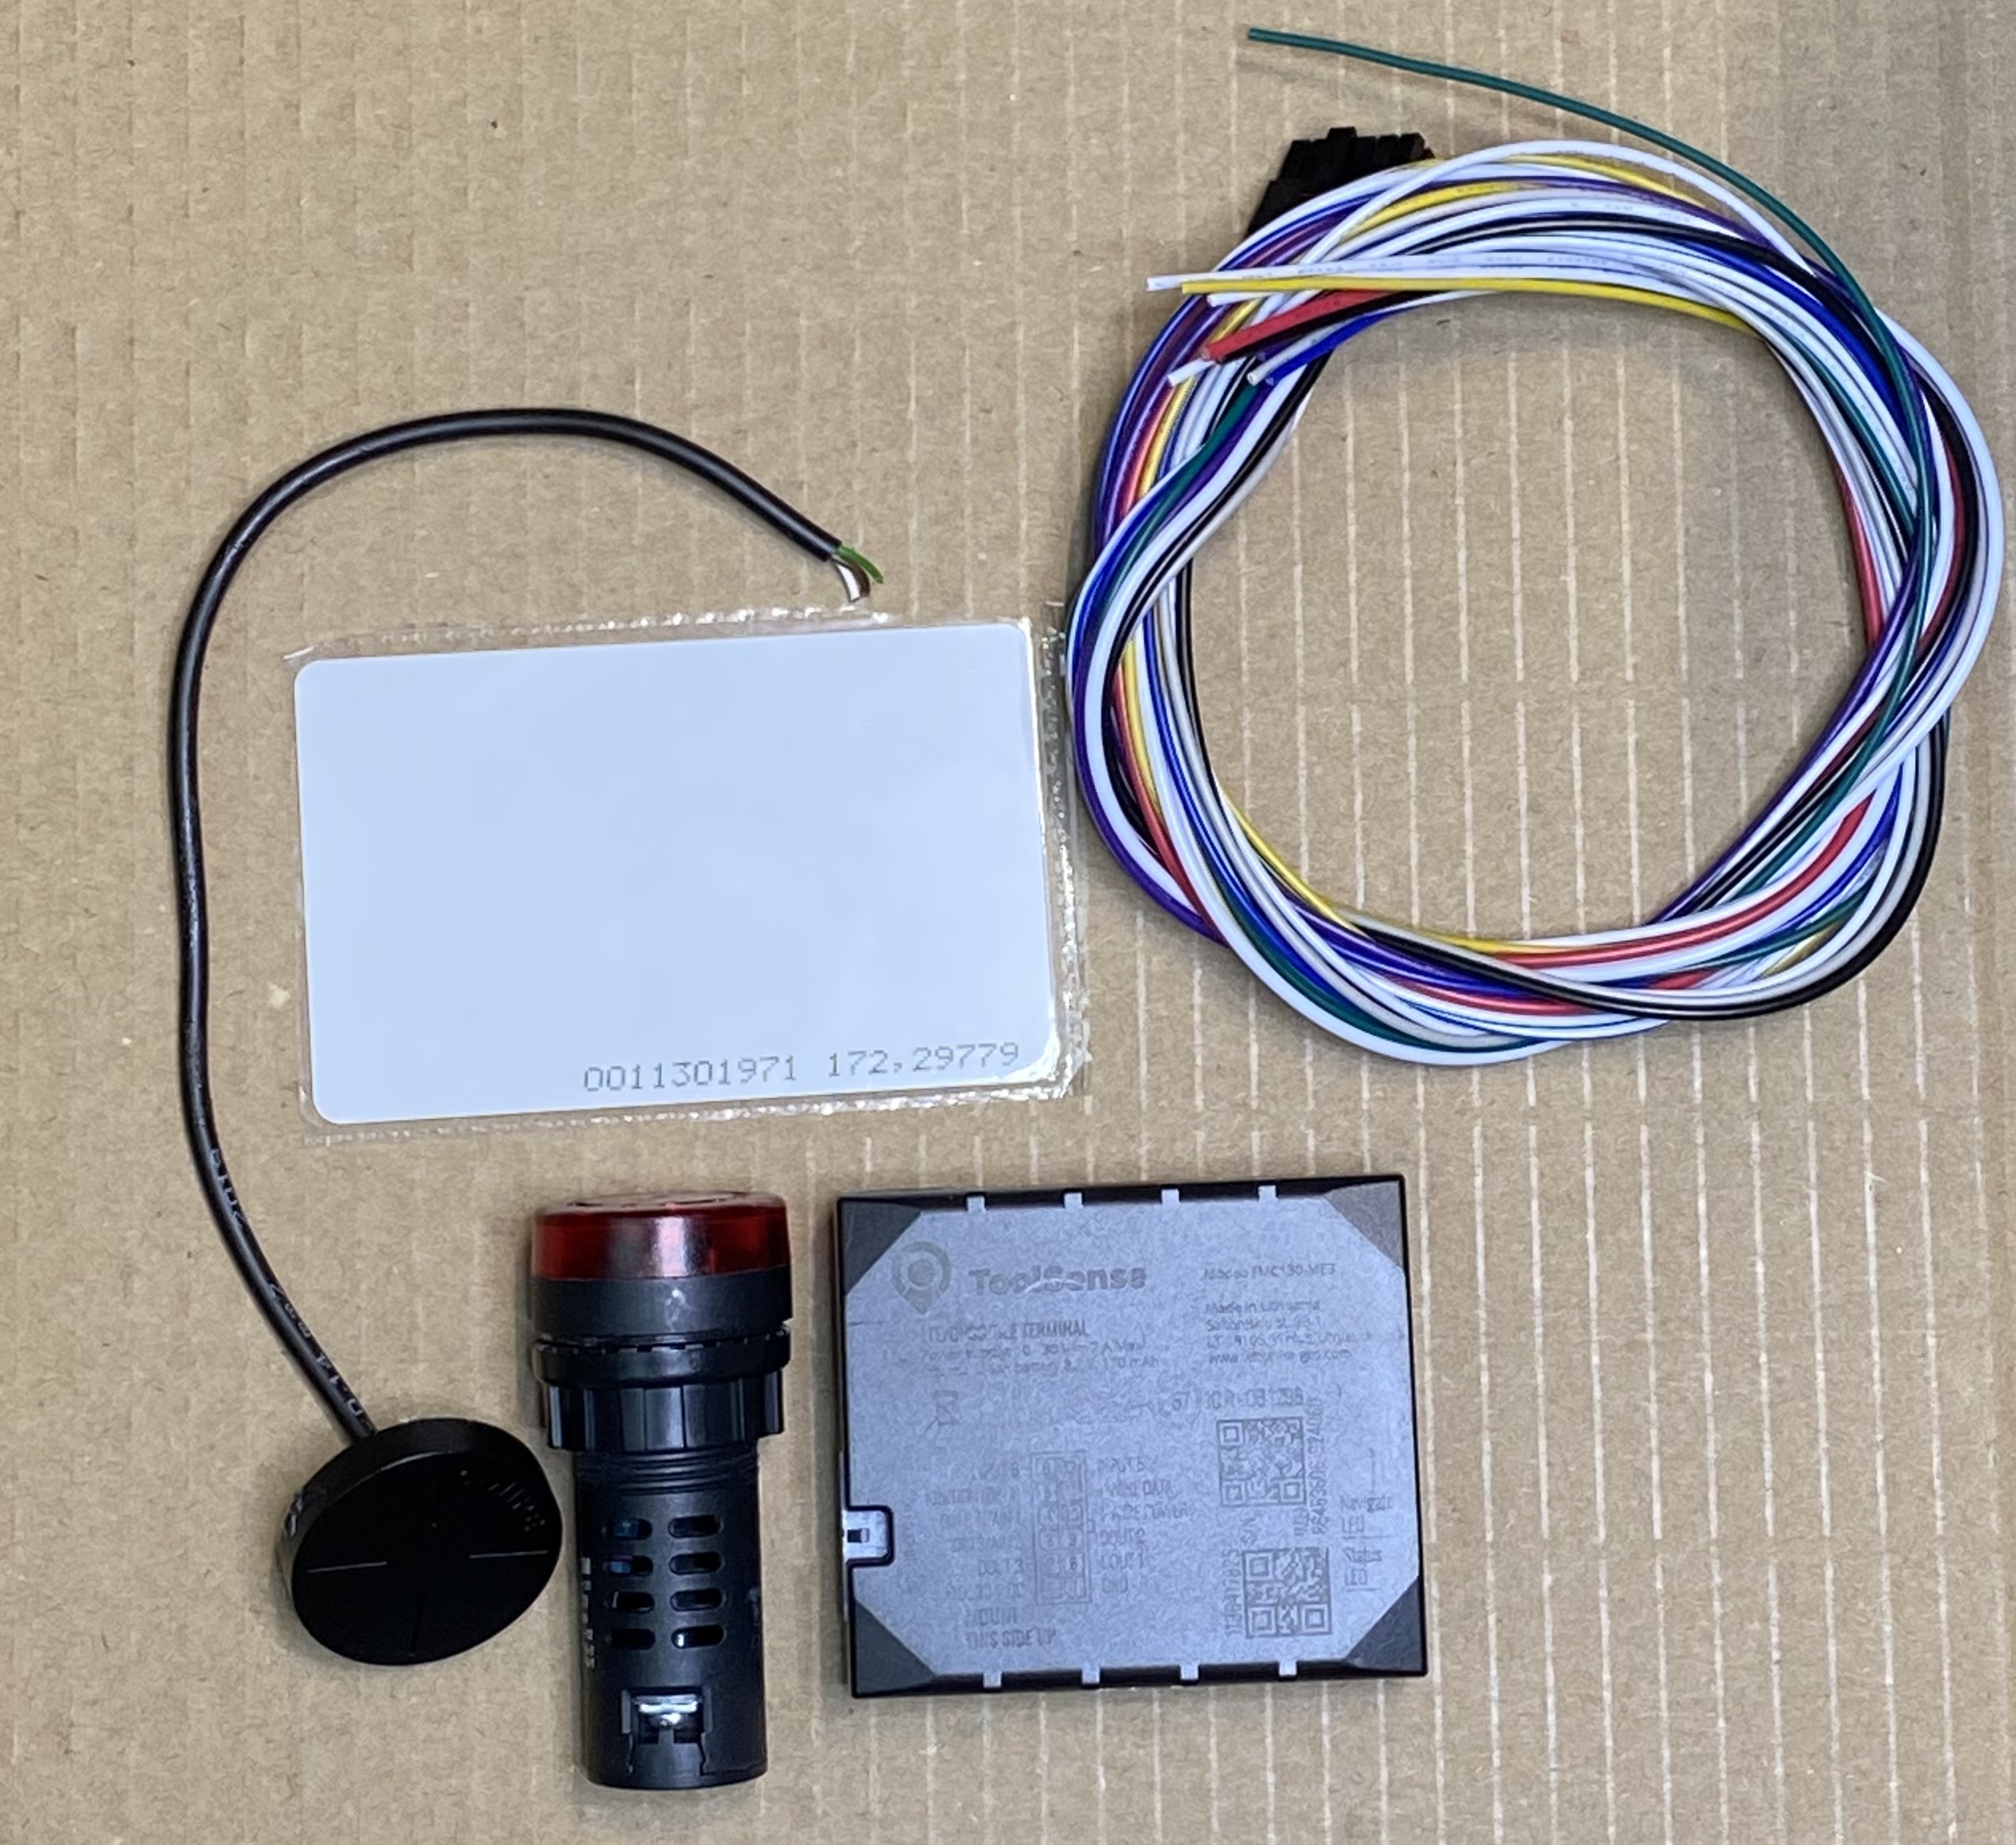
RFID card
RFID reader
Buzzer
Blackbird
Blackbird wire harness
Once you have every tool you can start installing the module into your machine.
Keep in mind that for aesthetic reasons you might need to drill holes in the dashboard of your vehicle or machinery.
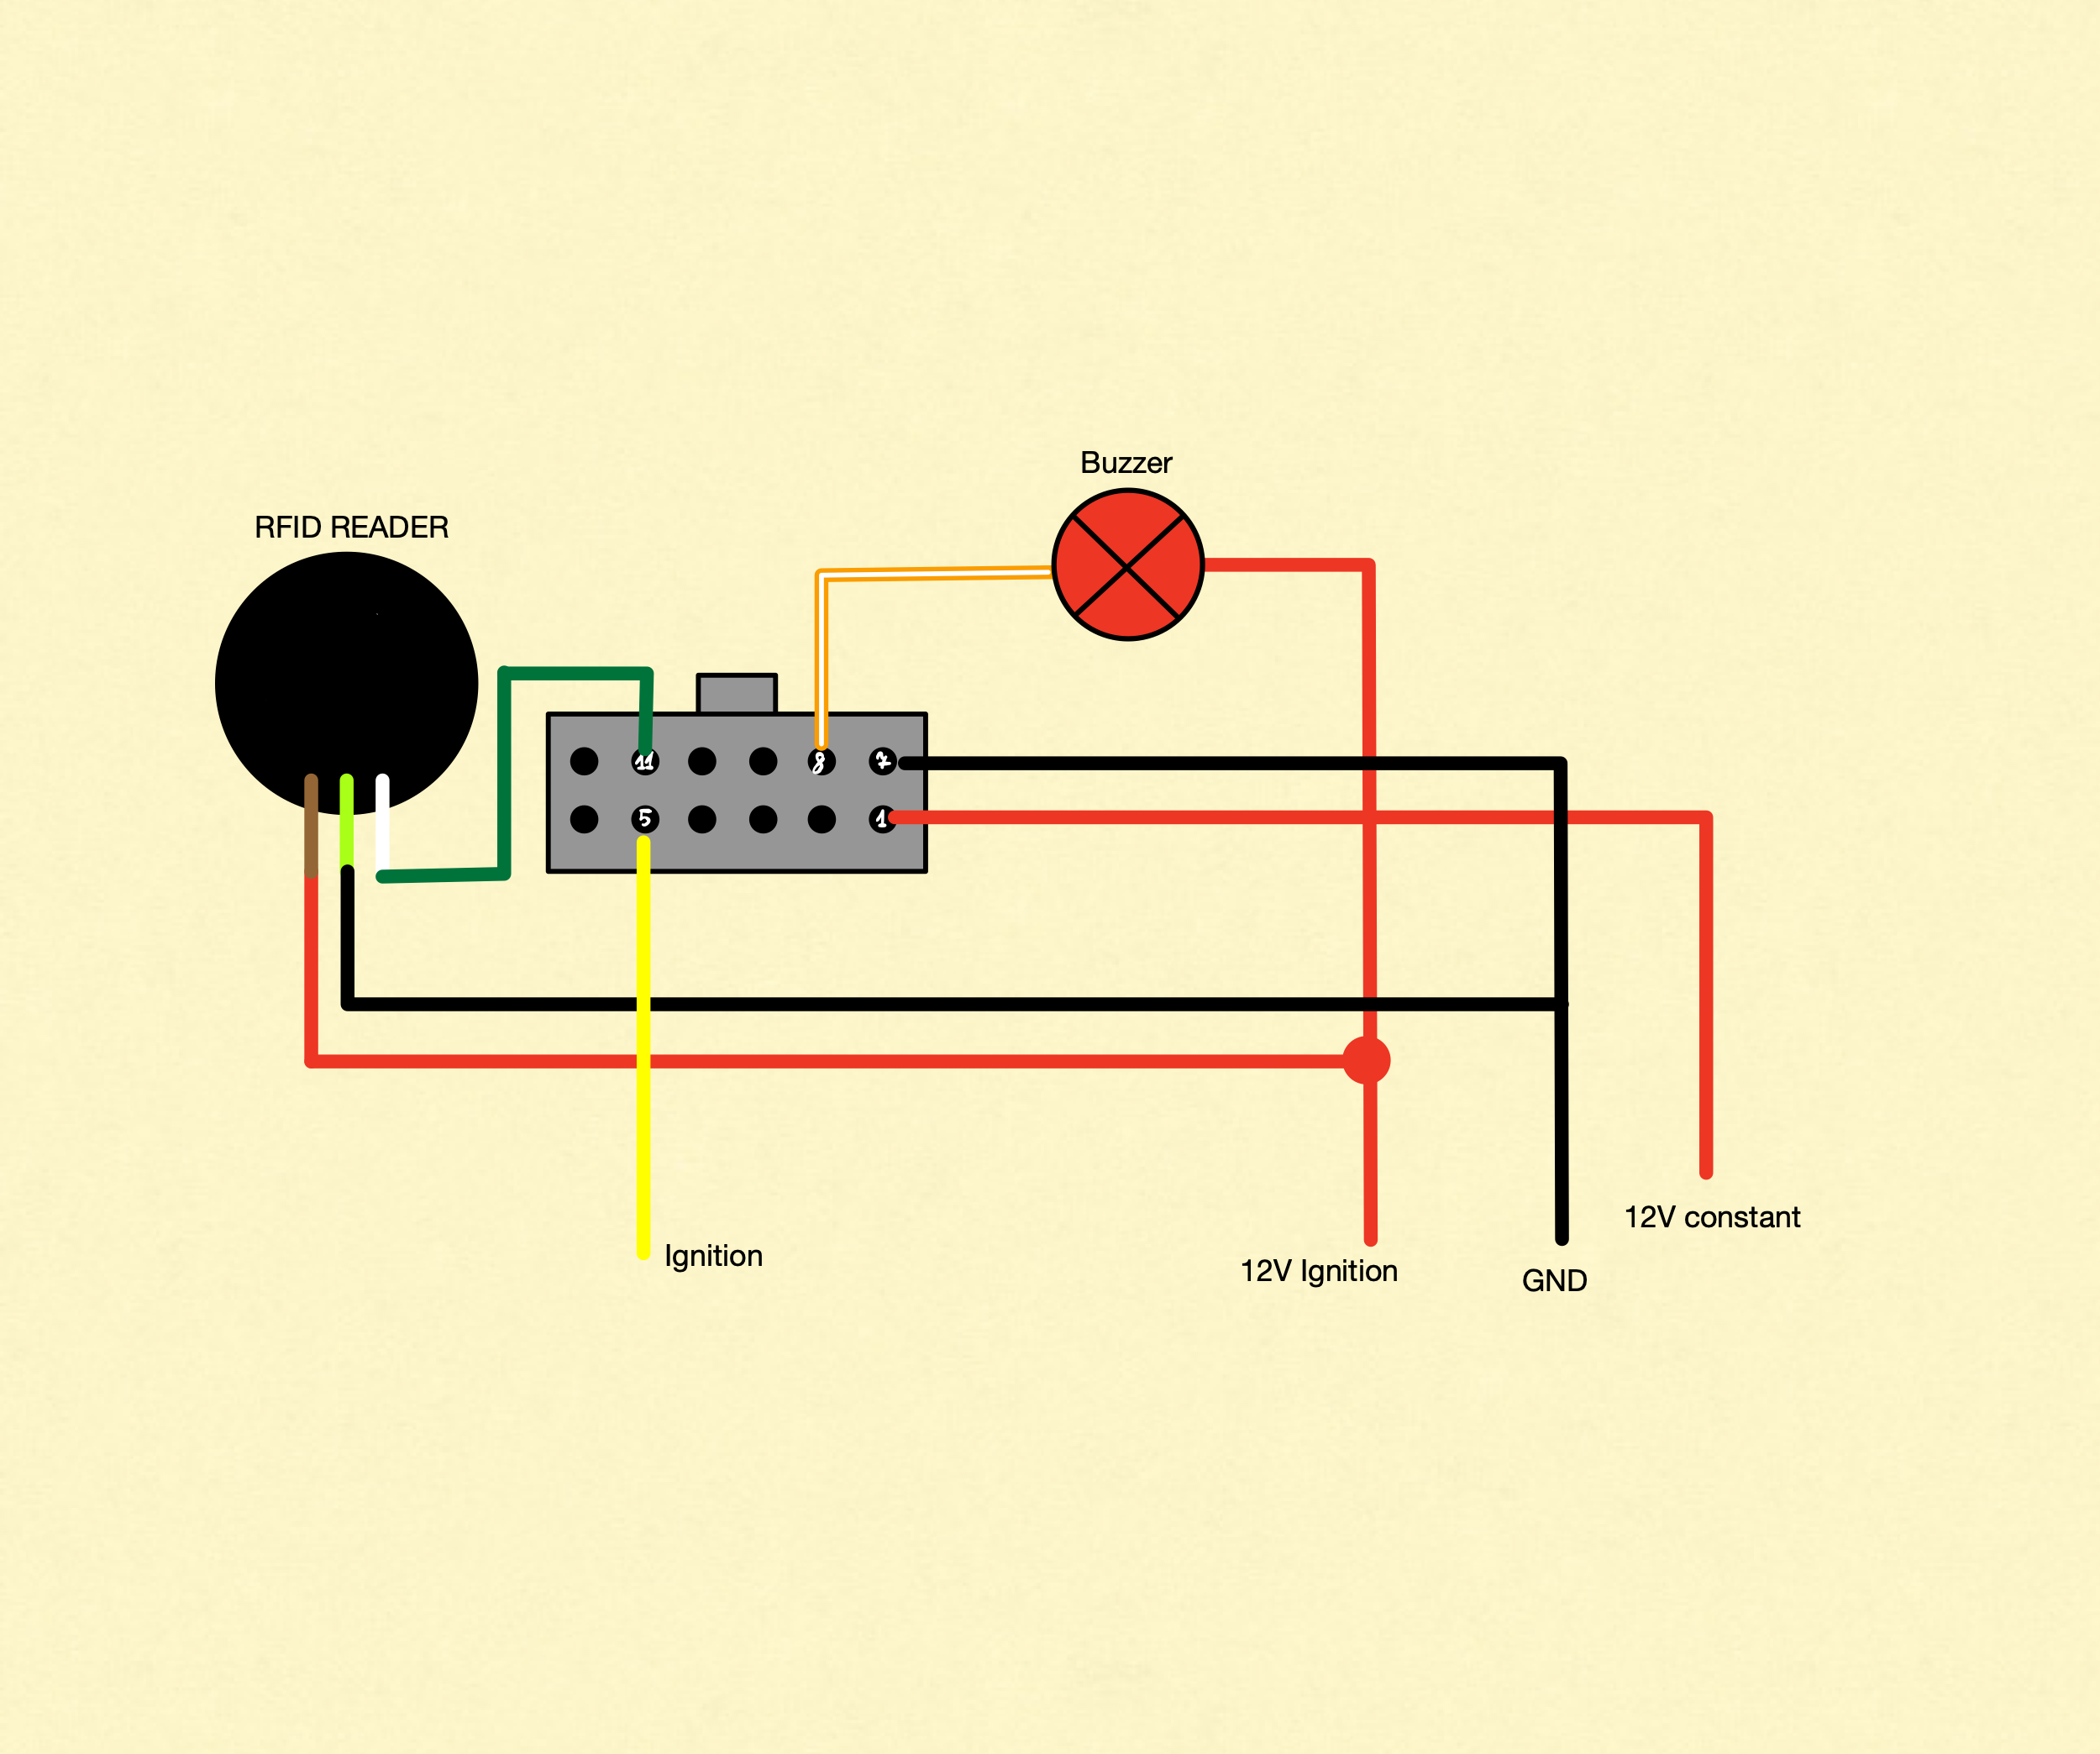
Make the connections based on the below wiring diagram, while also considering the following:
installing the buzzer is optional
mind the wires labeled with "12V ignition"
This means that you should use a wire that has voltage only when the machine/vehicle is turned on. Otherwise the beeper will continue beeping and the machine of the battery will get drained quickly after the machine is turned off.
the colours of the wires on the image correspond to reality with the exception of "12V ignition", which is a wire coming from the vehicle/machine
If you have wired up everything correctly, your integration should work without a problem. Give it a test run and try out different cards (authorised and not authorised) to see if everything is working. Keep in mind that the module needs proper signal to carry out the authentication process.

To see how you can assign cards to users and assets, check out our article about that topic.
Add a card ID to a user
To unlock a vehicle a person must have a card. This identifier of this card must be added to user of the person.