To access the Excel Import function, click on the More button in the top right corner and select Import Sites.
Once there, you’ll have the option to download an Import Excel Template. This is the most convenient way to use our import tool. You can map your existing data to the template spreadsheet, making your import process quick and easy.
If you prefer not to map your data in advance, you can also do it during the import process. For a smoother experience, we recommend renaming the column headings in your spreadsheet to match the field names used in ToolSense Sites (e.g., Site's name = Name, Type = Site Type).

Upload your site file. Simply drag and drop your file or select it via the “Select File“ button.
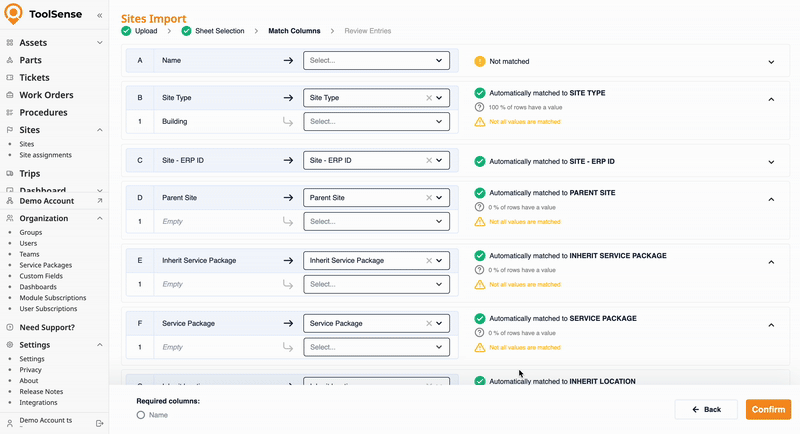
You’ll now see the mapping overview.
If you used the import template or matched your column headings with our field names, ToolSense will automatically suggest the correct mappings. You just need to quickly verify them.

In the mapping view:
The left-hand side shows the column headings of your uploaded file.
The right-hand dropdown lets you select the corresponding ToolSense site fields.
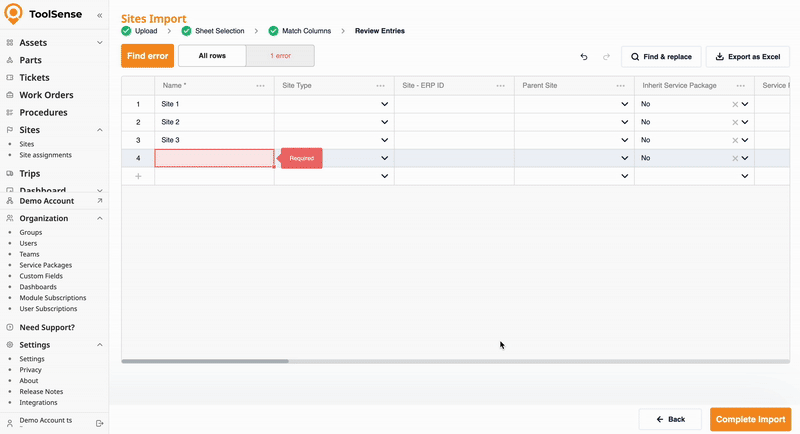
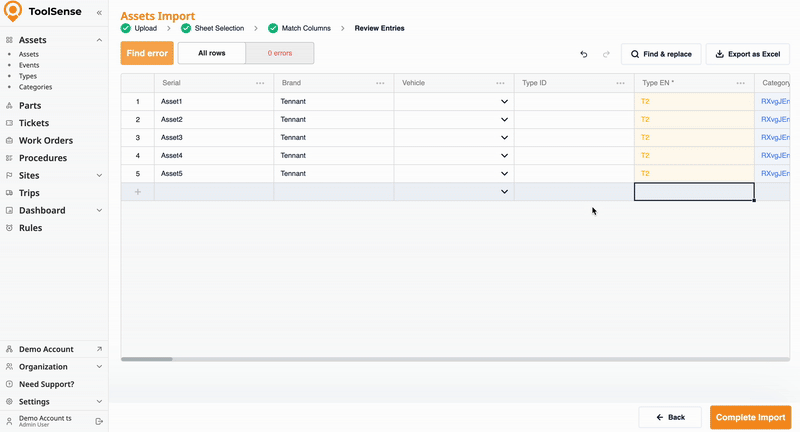
You’ll then see a final overview. The system will notify you if there are any errors found (e.g., missing serial numbers).
 Click on Errors at the top to review any issues found.
The overview works like a spreadsheet - you can edit data directly if you only need to fix a few small mistakes.
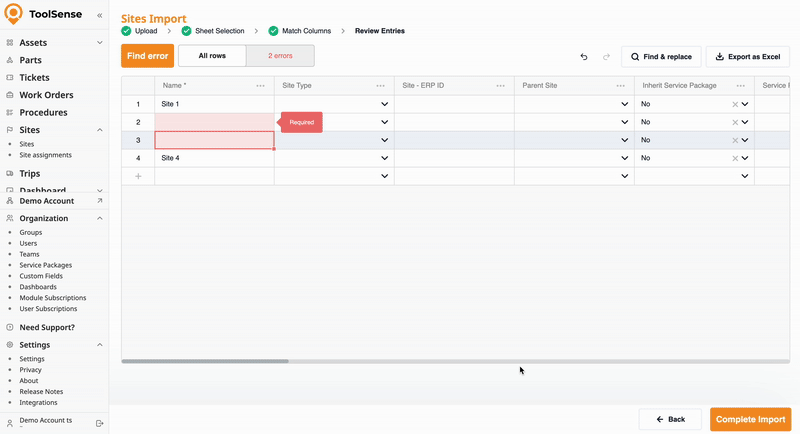
You can delete or duplicate rows.
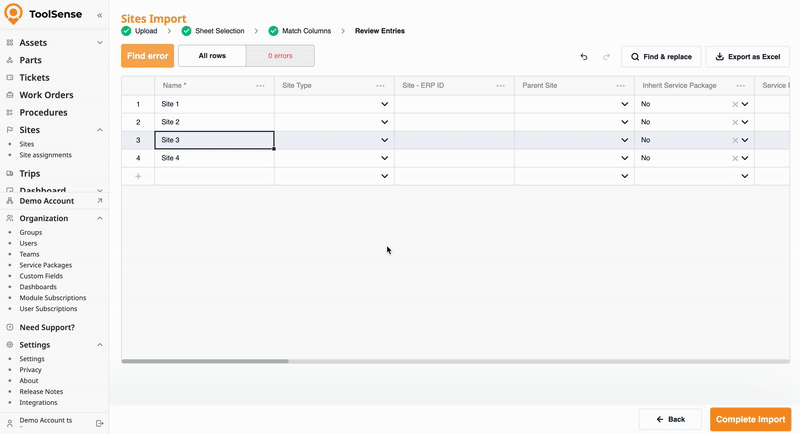
You can export a list including the error messages to edit it or contact our support team in case you need help.
For any relational data - such as type and assignment - ToolSense uses color codes:
Yellow cells indicate values matched with existing data in the system (e.g., "type: room" already exists - it will be reused).
Blue cells indicate new values that will be created.
If no errors are found, click Complete Import then confirm by clicking Submit and you’re done!