If you are not yet familiar with our Excel-Import-Tool, please first read the article below. It includes all details on how to interact with the Mapping-Overview and List-Overview.
How To Import Assets with the ToolSense Excel Import Tool
Step-by-step guide to quickly upload your asset list
Use the filters in to select only the assets that need editing.
Click on More in the top right corner of the Asset list.
Click on Export Excel.
Open the exported Excel file and update the fields you want to change directly in the spreadsheet.
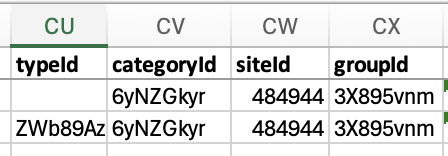
When editing Types, Categories, Groups or Sites:
The last columns in the exported file contain IDs for those attributes. If you want to update such values, you need to remove the corresponding IDs - otherwise, no changes will be applied.
If you’re updating these fields with existing values, it’s best to update the ID to avoid duplicates. If you don’t - check for yellow cells in the Import Tool to make sure your data has been matched correctly.
The mapping overview may include nested cells for sites and groups. Use these to adjust the mapping correctly.
Example: Your ToolSense Group “Technic” is named “Technical Team“, make sure those values are matched correctly and adjust via the dropdown if needed

Open the Asset List and click on More in the top right corner.
Click on Update Assets.
Upload the updated Excel file, map the columns as needed, and confirm the import.

To ensure a smooth and error-free update, follow these guidelines:
Limit the Number of Assets per Update:
Avoid updating large amounts of assets simultaneously.
Filter the asset list to a manageable size to save time and minimize risks.
Date Format Requirements:
Use the format DD.MM.YYYY (e.g., 01.01.2024).
If the date is incomplete (e.g., only the month and year), the importer will display an error and block the update.
Prevent Typos in Key Columns:
Typos in the following fields can create unwanted new entities and disrupt filters or rules:
Category
Type
Brand
Location