Sites in ToolSense are entities that hold assets. These can be physical locations like buildings, construction sites, or rooms. However, sites can also represent more abstract concepts, such as vehicles or even people in specific contexts. Sites are essential for organizing and tracking your assets effectively. Additionally, you can create subsites and establish relationships between them (e.g., linking rooms to a building).
To add a new site, navigate to the Sites menu and click the Add Site button located at the top right of your screen. You will be prompted to enter the following details:
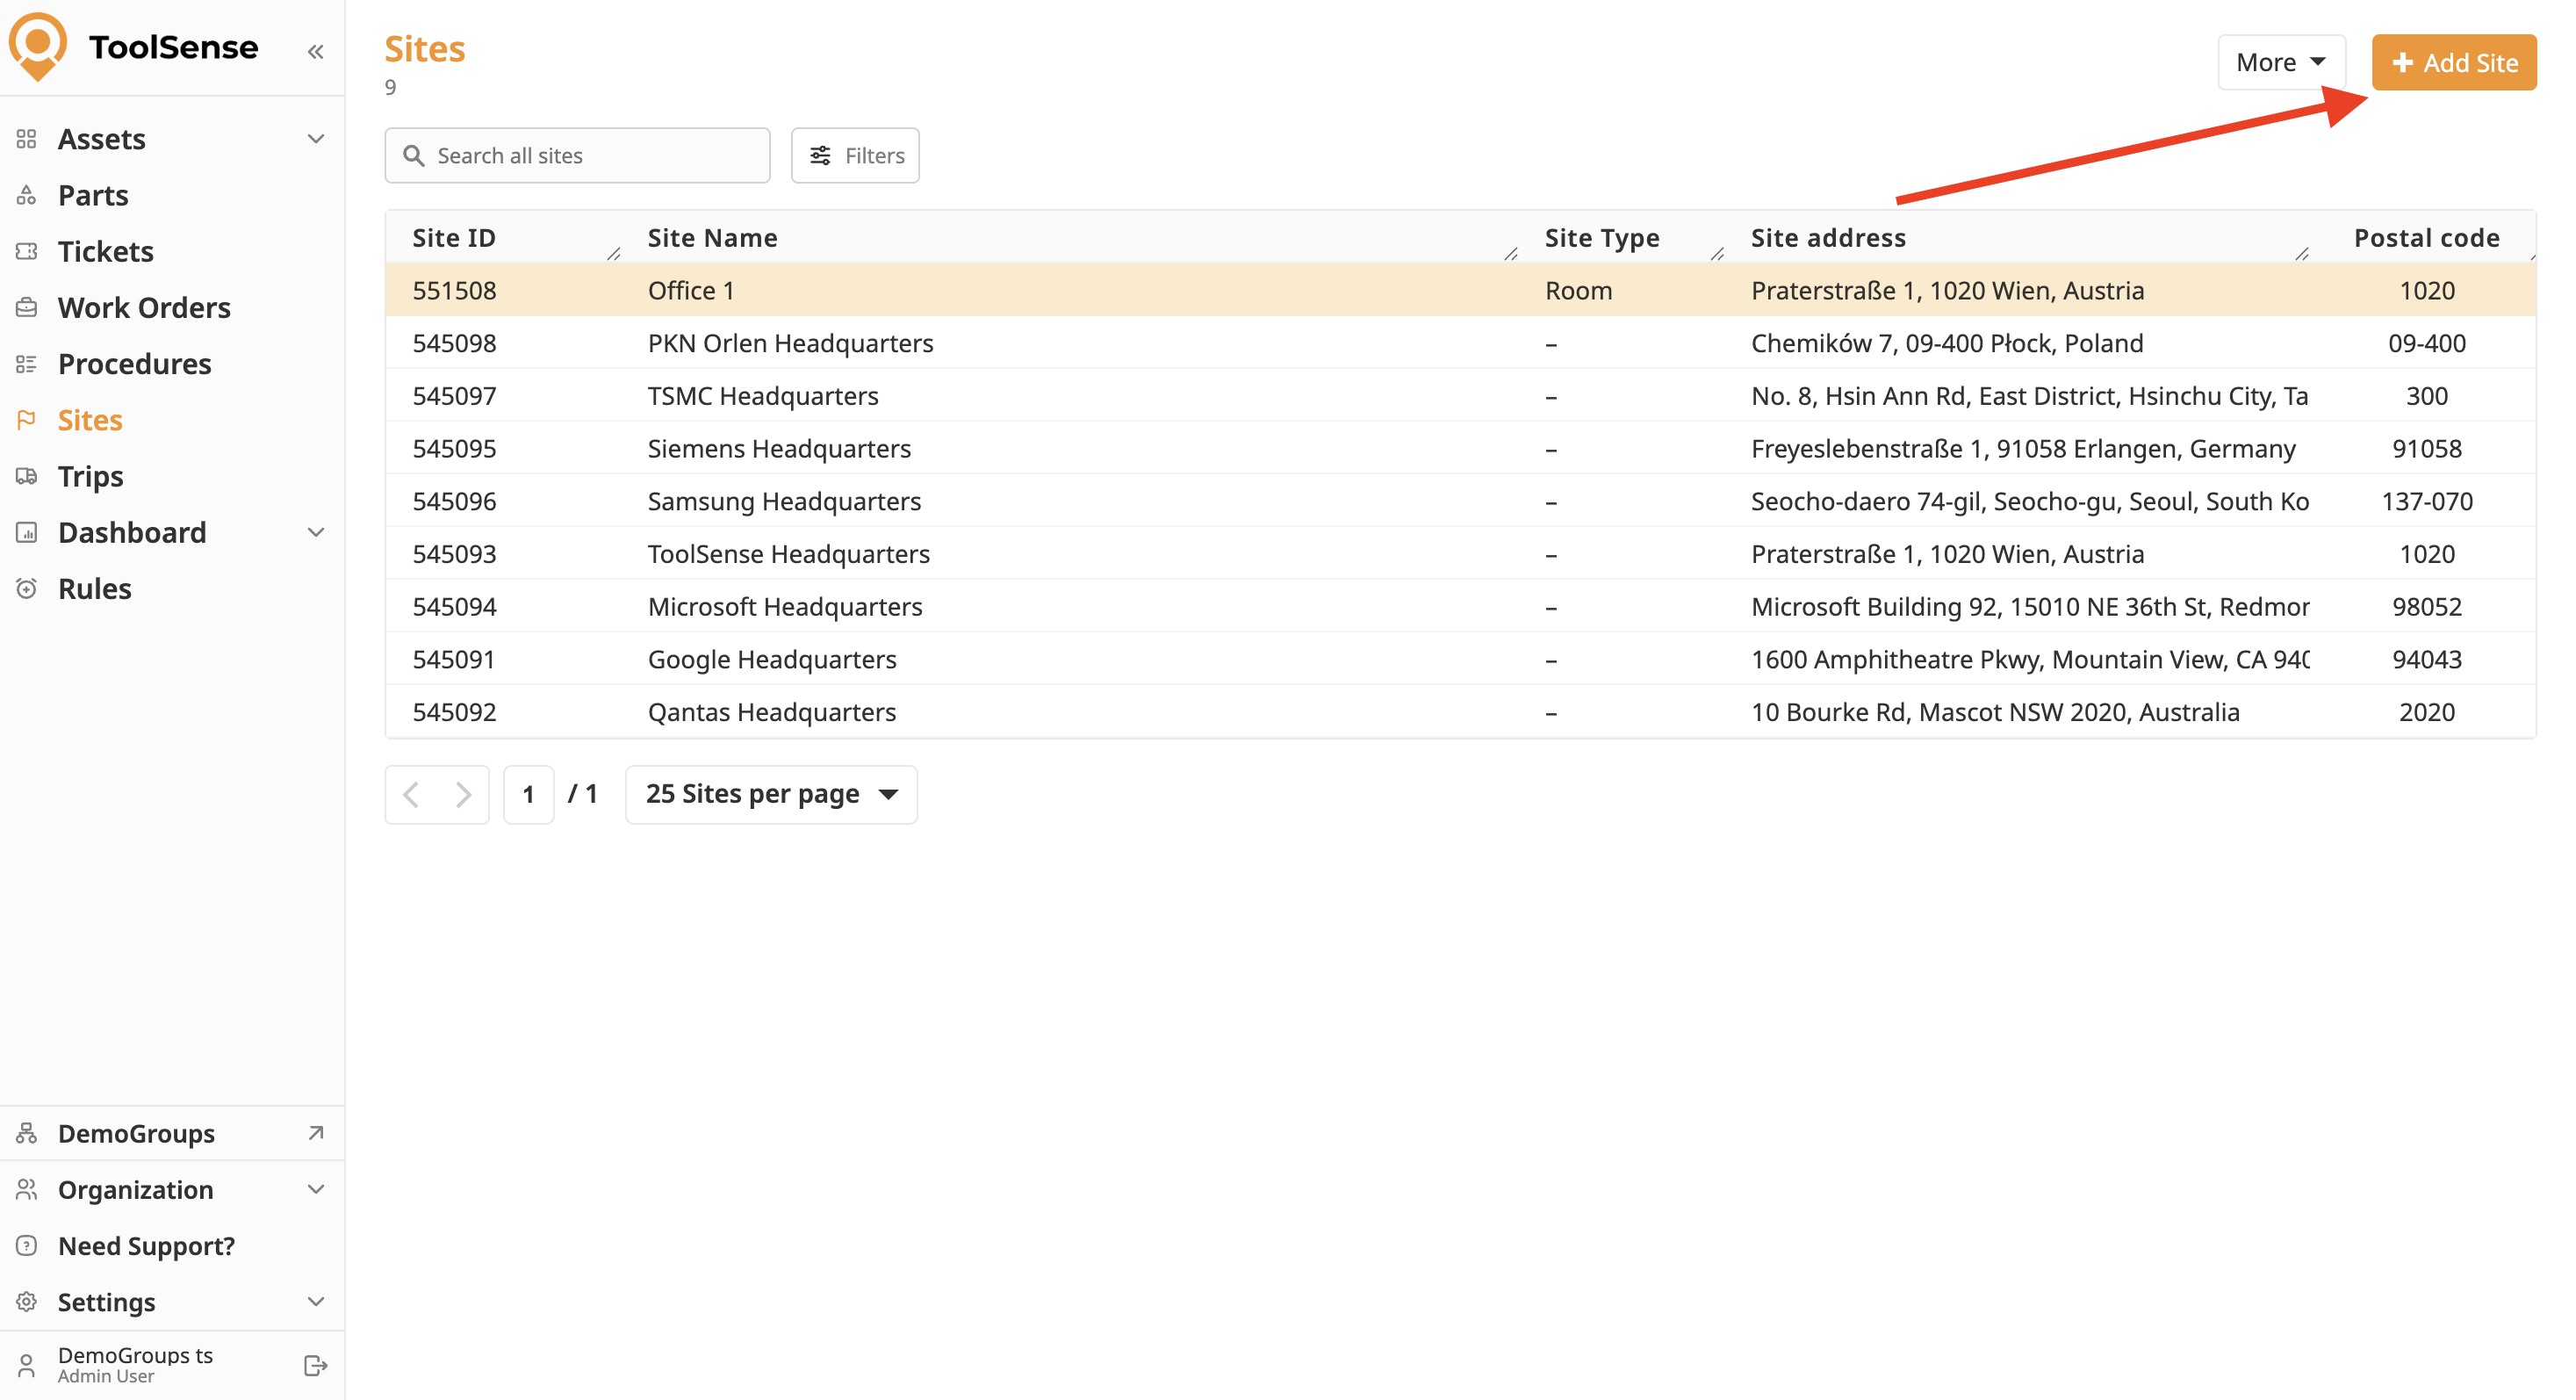
Site Name (required)
ERP ID
Site Type (e.g., Room, Building, Construction Site)
Site Account Number
Service Package (Sites can benefit from Services e.g Cleaning request, Yearly maintenance,…)
How To Configure Service Packages
Manage the Visibility of your Services by Creating and Assigning Service Packages
Notes
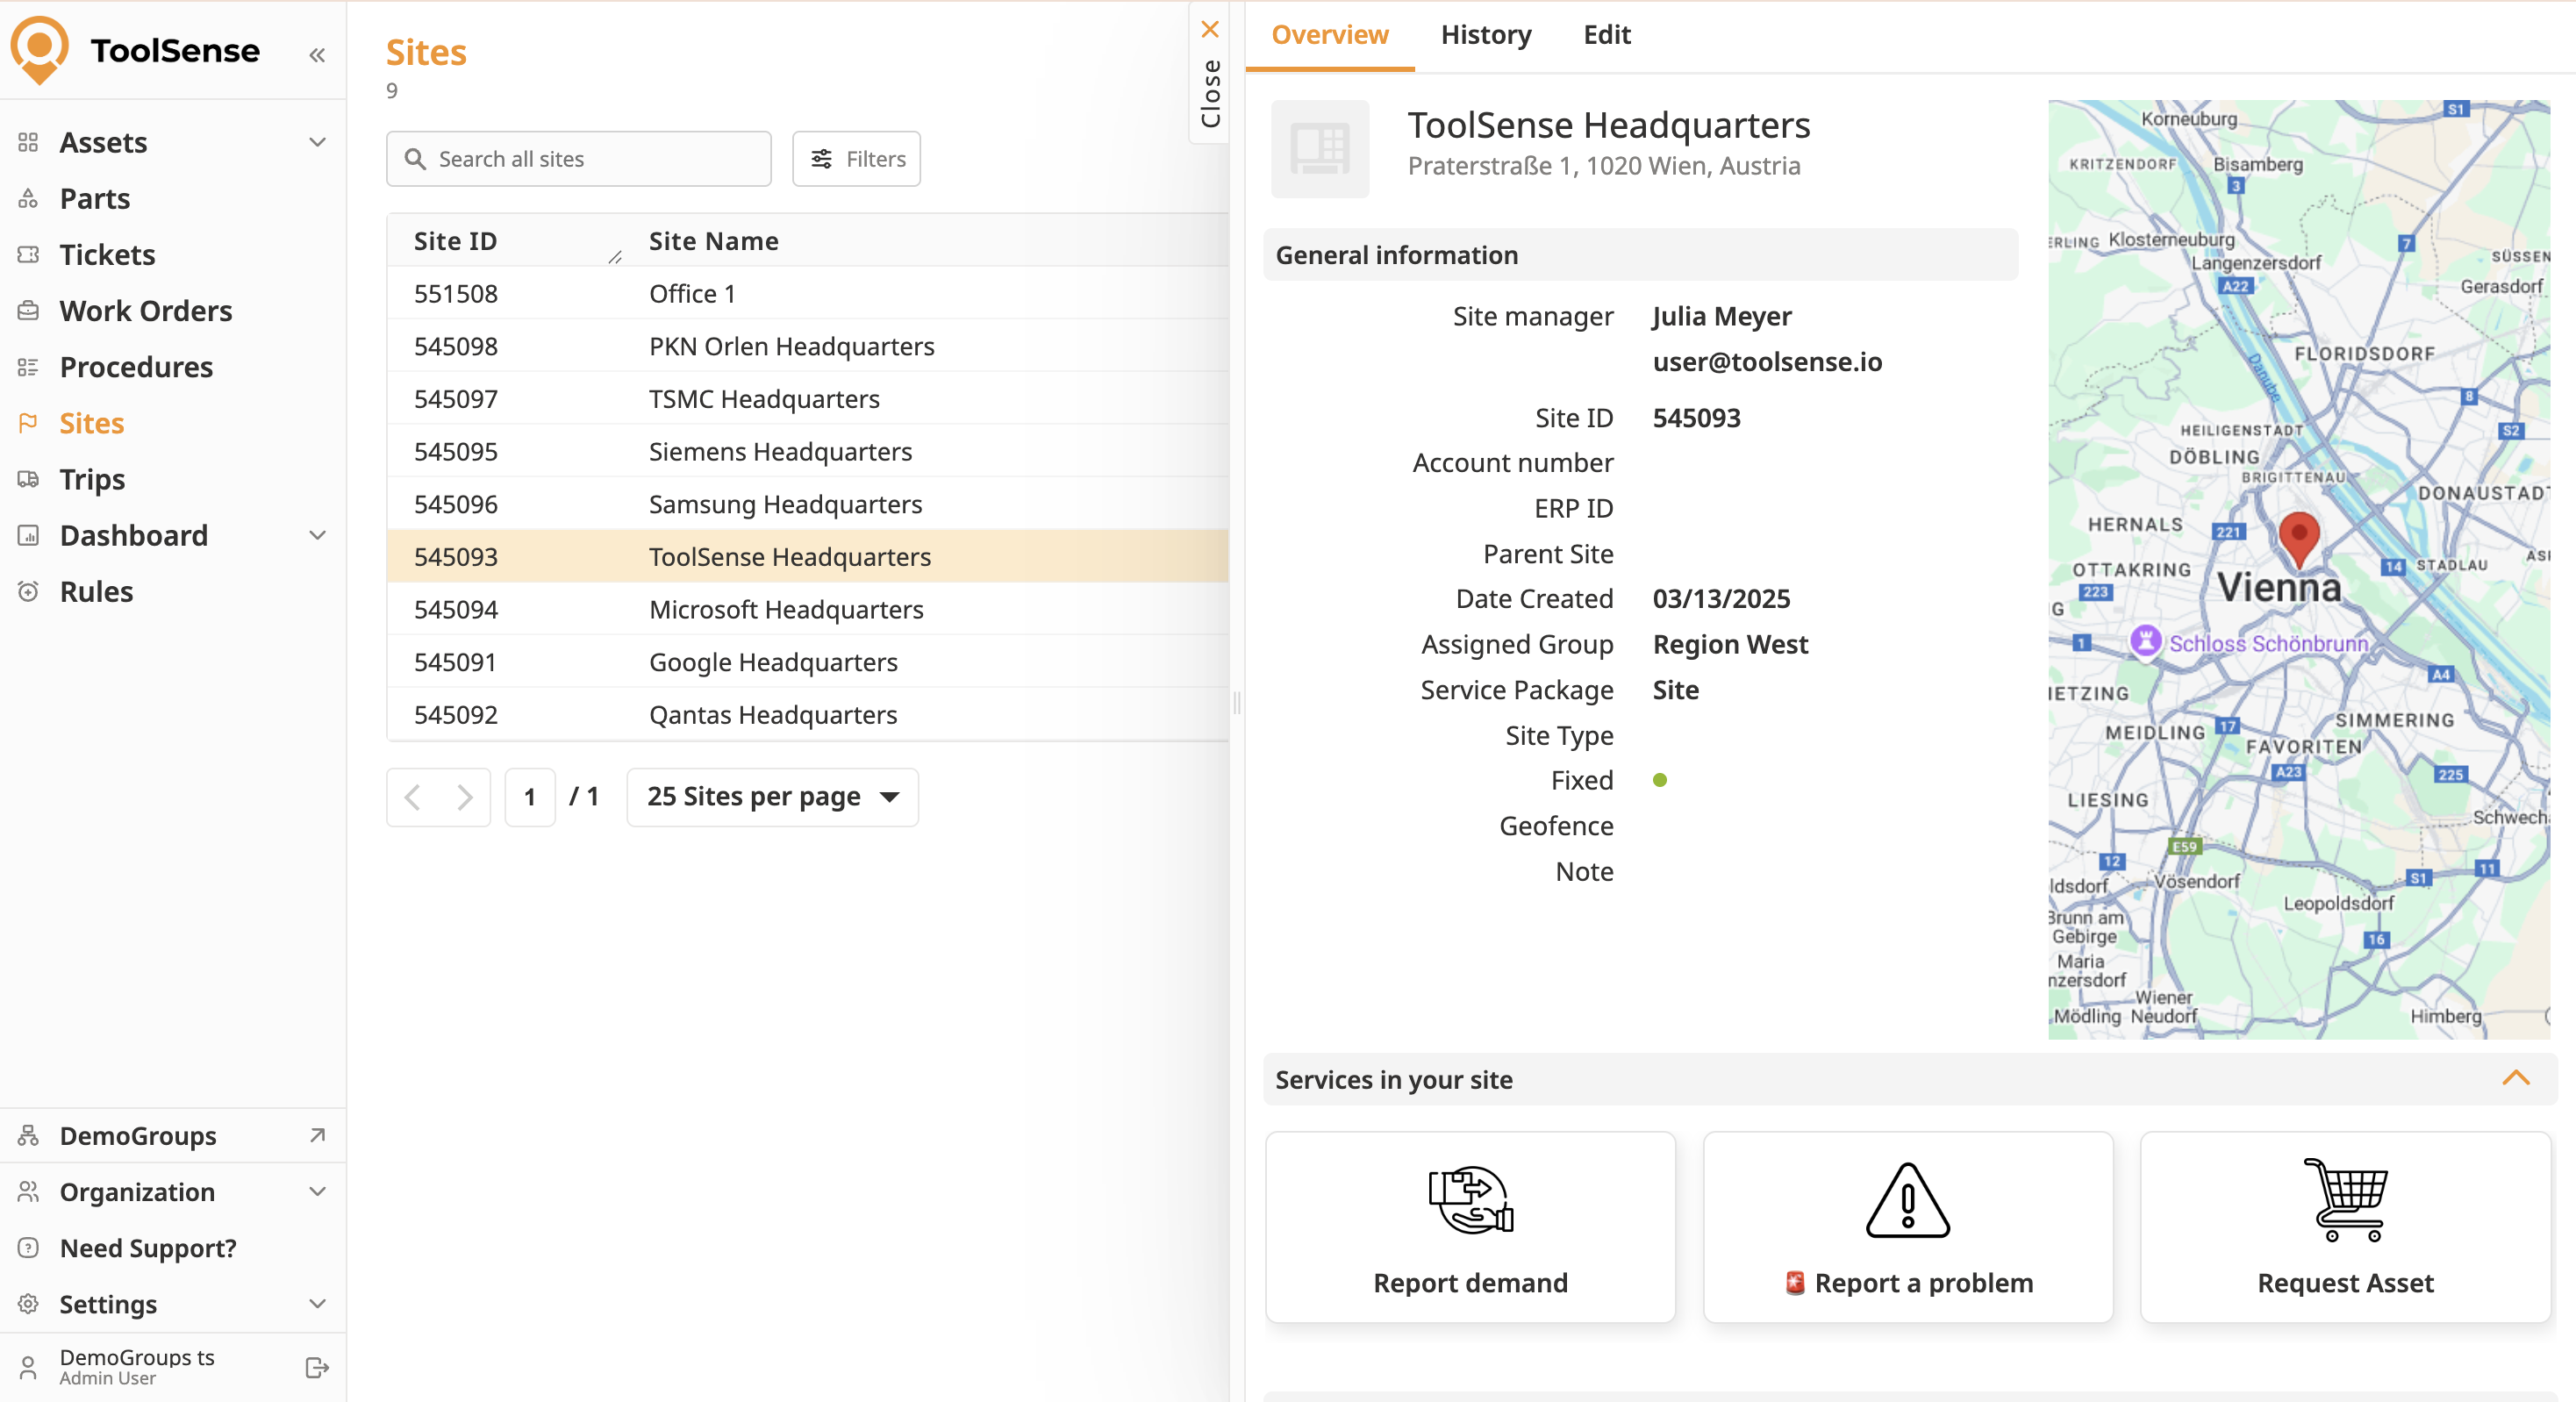
Assignment: You can assign a site either to a parent site or to a group. If assigned to a parent site, it will inherit the parent site’s group assignment.
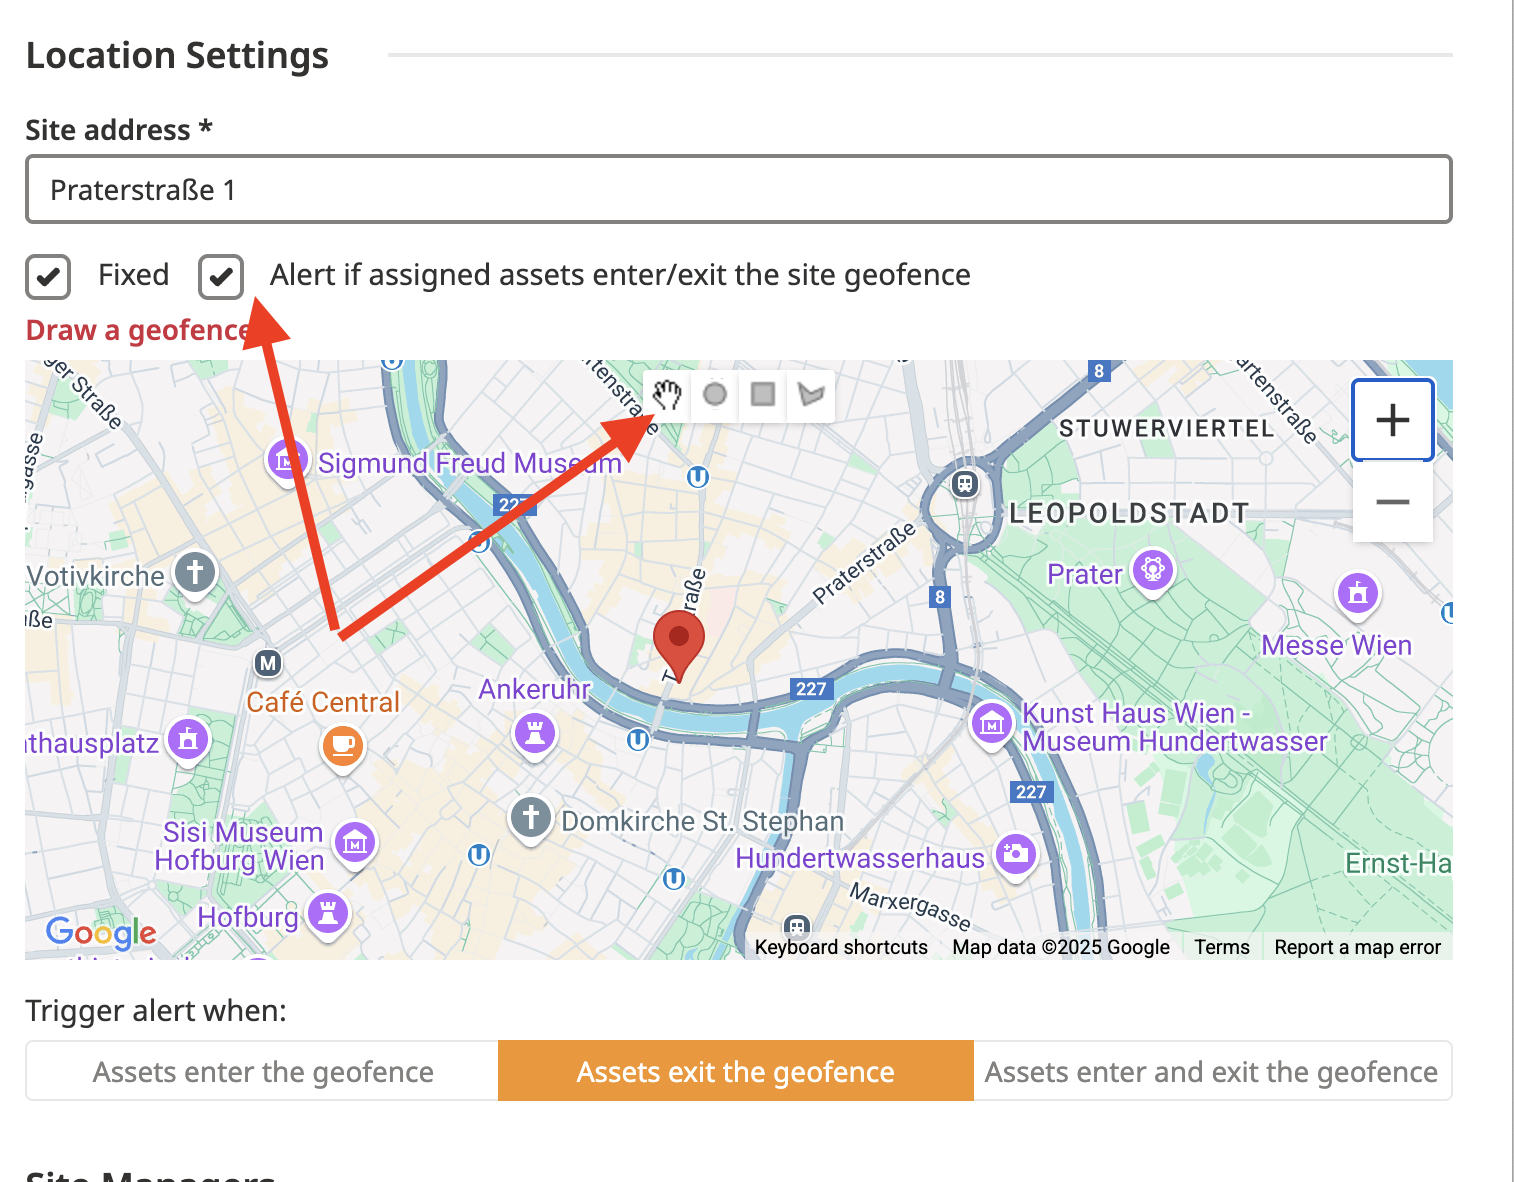
Location: In the Location Settings, you can add a site’s physical address. If an address is not available, follow the steps of the article below.
How to Add Sites Without Addresses in ToolSense
Learn to use Google Maps Plus Codes to add and manage sites in ToolSense that lack traditional addresses.
Geofencing: You can also set up geofencing around your site. This allows you to receive notifications when assets with IoT devices enter or exit a defined area.
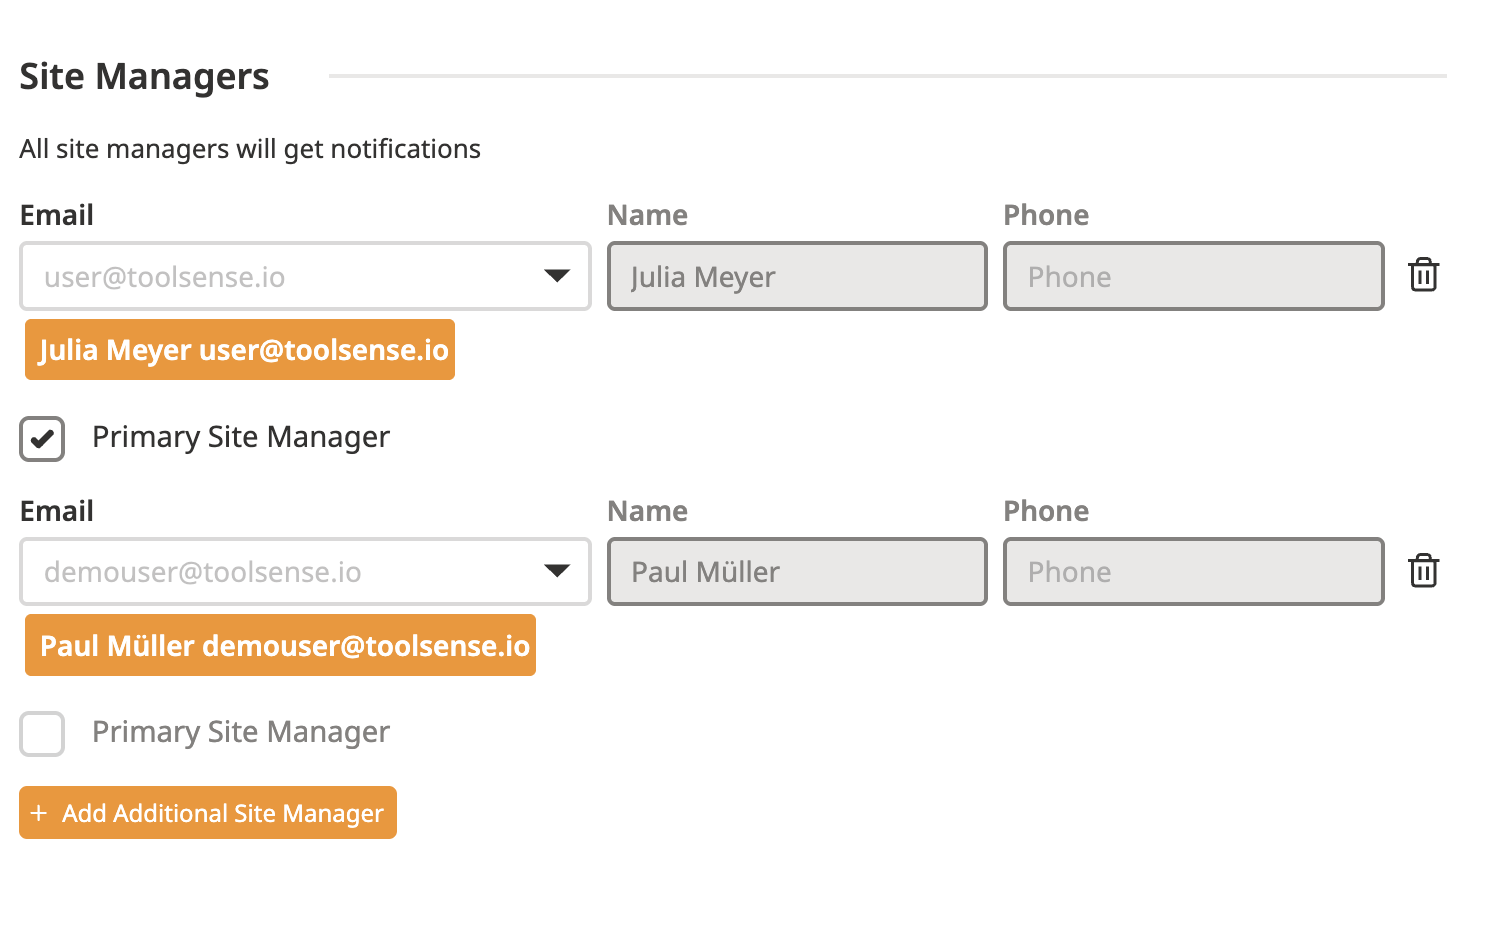
Site Managers: You can assign multiple site managers to a site, but only one can be designated as the primary site manager. Site managers can be either existing users or added via their email addresses. They will receive weekly update emails regarding the site’s activities.
Weekly Summary Email (Site Managers)
Setup and content
Managing Site Information:
In the Overview tab, you can view essential information about the site, including the site’s name, ID, assigned manager, location, and any additional notes.
Tracking Site Events:
The History tab logs all changes and activities related to the site, including asset assignments, modifications to site settings, and changes in site management. Custom events can also be added to improve tracking and transparency.
QR Codes:
Each site and subsite can be connected to a unique QR code. This QR code can be attached physically to the site for easy identification. Scanning the QR code allows quick access to the site’s information and the ability to perform services like submitting a problem report.
You can assign the QR Code by following the same steps as when assigning a QR Code to an asset - just search for your site instead.
How To Assign a QR-Code
Add a QR-Code to an existing Asset
Site Location and Geofencing:
Assign a specific address to the site, and define a geofence around the area. This is particularly useful for monitoring when assets enter or leave the site.
Site Management:
The Site Manager oversees the assets within a site. You can assign multiple site managers and designate a primary one. Site managers are responsible for ensuring the smooth operation of assets and play an important role in notification settings. You can set them to receive notifications for tickets related to assets at their site via a groups ticket handler. To learn more about ticket handlers and notifications, refer to the article below.
🆕 Ticket Handler Management
This document provides a guide to the new way of managing Ticket Handlers
Assets in Sites:
Assets are assigned to specific sites, including vehicles, machinery, or other equipment. If needed, assets can be relocated between sites using the standard relocation form or a custom one created through procedures.