Views help you tailor lists to your workflow by saving filters and column setups in one place. Instead of rebuilding the same searches repeatedly, you can quickly switch between views to access, share, or export exactly the data you need.
They’re especially useful when working with date and number filters, for example to track expiring leases, upcoming inspections, or cost-intensive assets.
Views can be:
Personal, for your own daily work
Shared, so teams and sub-groups work with consistent asset lists
Hidden, if you don’t need certain default or shared views
By using views, you create clear, reusable overviews that improve efficiency, transparency, and collaboration across teams.
In the next section, you’ll learn how to create, manage, and use views step by step.
You can either create a completely new view or duplicate an existing one. Duplicating is especially useful if you want to create multiple views with similar filters and only minor differences in values.
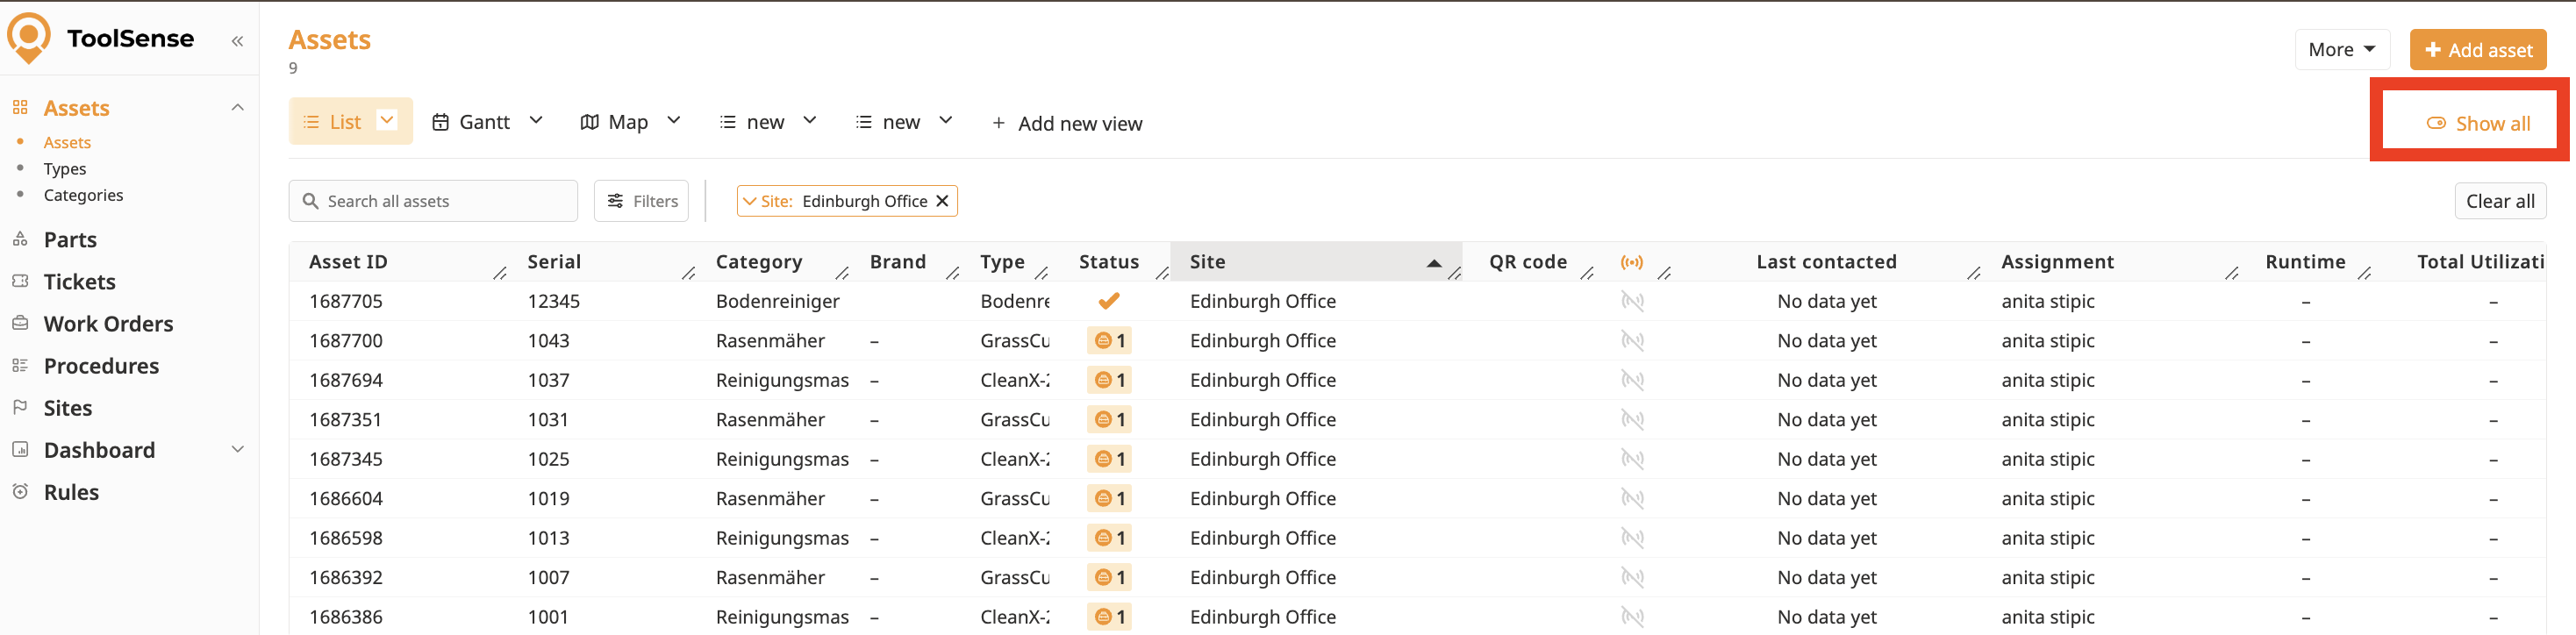
Click “Add New View” in the Views bar.
Enter a name for your view (required).
Click “Save New View”.


Instead of starting from scratch, you can duplicate an existing view with all its settings and filters and edit it from there.
Click the arrow next to the view you want to duplicate.
Select “Duplicate View”.

Add additional filters or adjust the selected columns. (see below)
Save the view.

You can organize your Views bar, adjust filters, and configure visibility settings to keep things clean and manageable.
Open the view you want to customize.
Click “Filter”.
Set one or multiple filters to narrow down your asset list.
Click “Save” in the view pop-up.
Learn more about filters in the article below:
How To Manage Filters
Stepy-By-Step Guide for managing filters in ToolSense
You can further customize your view by hiding columns and changing their order.
To open the column editor:
Click the arrow next to the view name
Select Select Columns
From here, you can rearrange and hide columns based on your needs.
The column editor separates Visible Columns and Invisible Columns.
By default, all columns are visible. You can select individual columns or select all at once.
Drag and drop columns to change their order, allowing the most relevant information to appear first.
Once you’re done editing your columns, make sure to save your changes:
Close the column editor by click on it’s X or anywhere outside of it.
Open the view popup and click Save to apply changes.
 Pro Tip:
To quickly reduce columns, select all columns, hide them, then only show the columns you actually need.
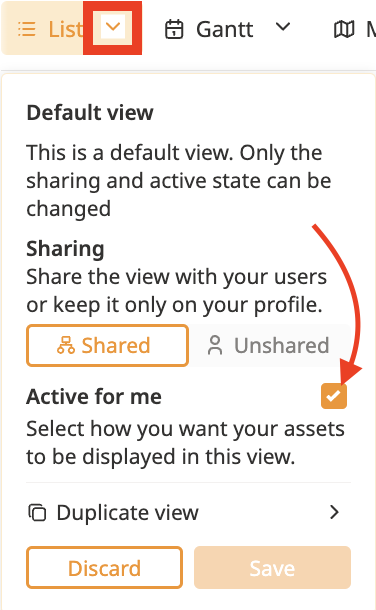
You can update:
View name
Display mode
Sharing status (Shared  Unshared)
Active for me (toggle view visibility)
Visible columns and their order
Default sorting
Active filters
Search string
Note: When you make any changes, a red dot appears on the view tab indicating unsaved changes.
To save:
Open the view popup.
Click Save.
If you leave the page without saving, changes will be lost automatically.
To discard unsaved changes manually, click the Discard button in the view popup.
Open the view popup.
Click Delete.
Confirm deletion.
Important:
If you don’t have sharing rights, you can only delete views you created.
With sharing rights, you can delete any views in your group.
Deleting a shared view removes it for everyone.
Instead of deleting, consider hiding the view (see related article below).
If you don’t need to see all available views, you can hide them for yourself or rearrange them to keep relevant information visible at a glance.
Click the arrow next to the view you want to manage.
Check the box labeled "Activate for me" to deactivate the view for yourself.
Click “Save” to confirm your changes.
Click the "See All" toggle button to see all views (including hidden ones).
To unhide the view:
Click the arrow next to the view you want to manage.
Uncheck the "Activate for me" box.
Click on Save.

Drag and drop views directly in the Views bar to reorder them.