After importing your assets & creating the inspection checklists on ToolSense, the next step is to set up the check process:
Set up the calendar of inspection for each asset
Getting reminders for the upcoming inspections
Set up the process to validate the check by filling the relevant checklist
Go in the Asset list and open the asset overview of an asset for which you would like to set up a check.
Open the "Checks" window and click on "Add check"
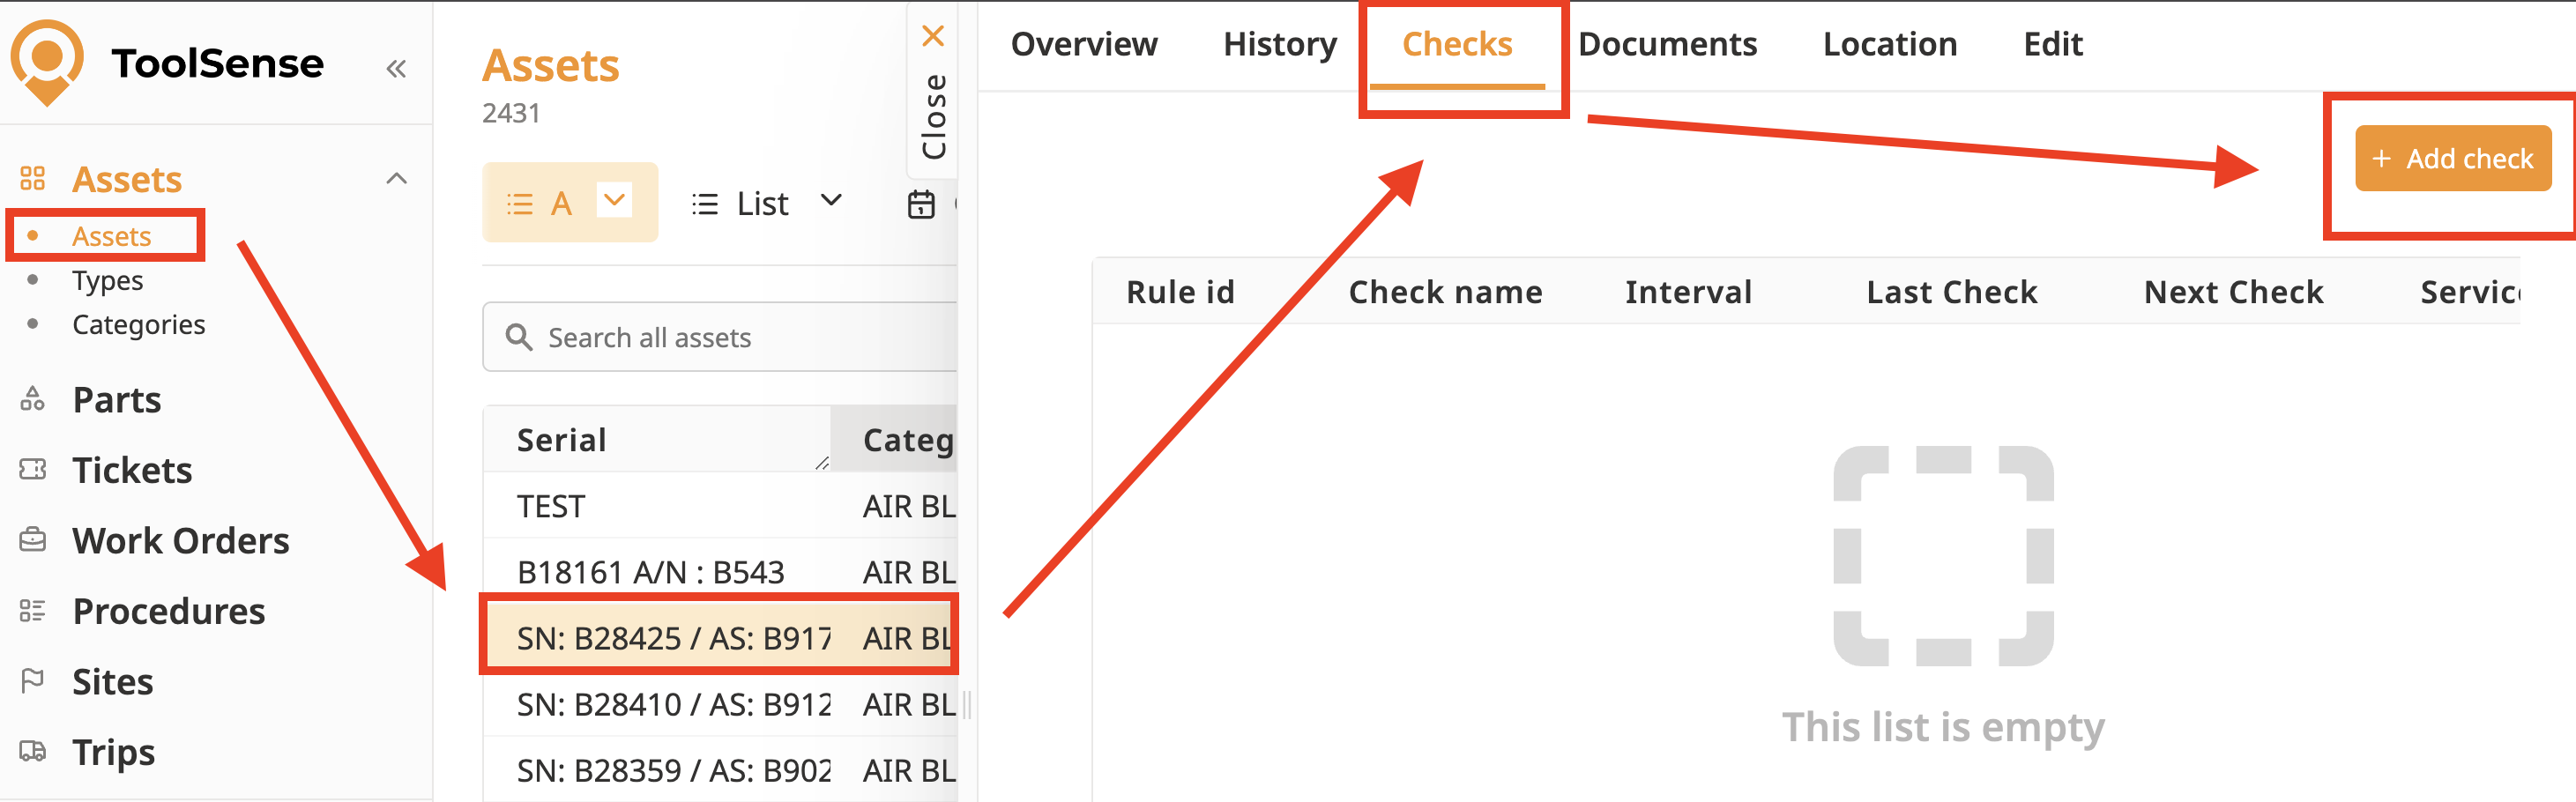
A new panel appears, in which you can set the inspection calendar for this asset.
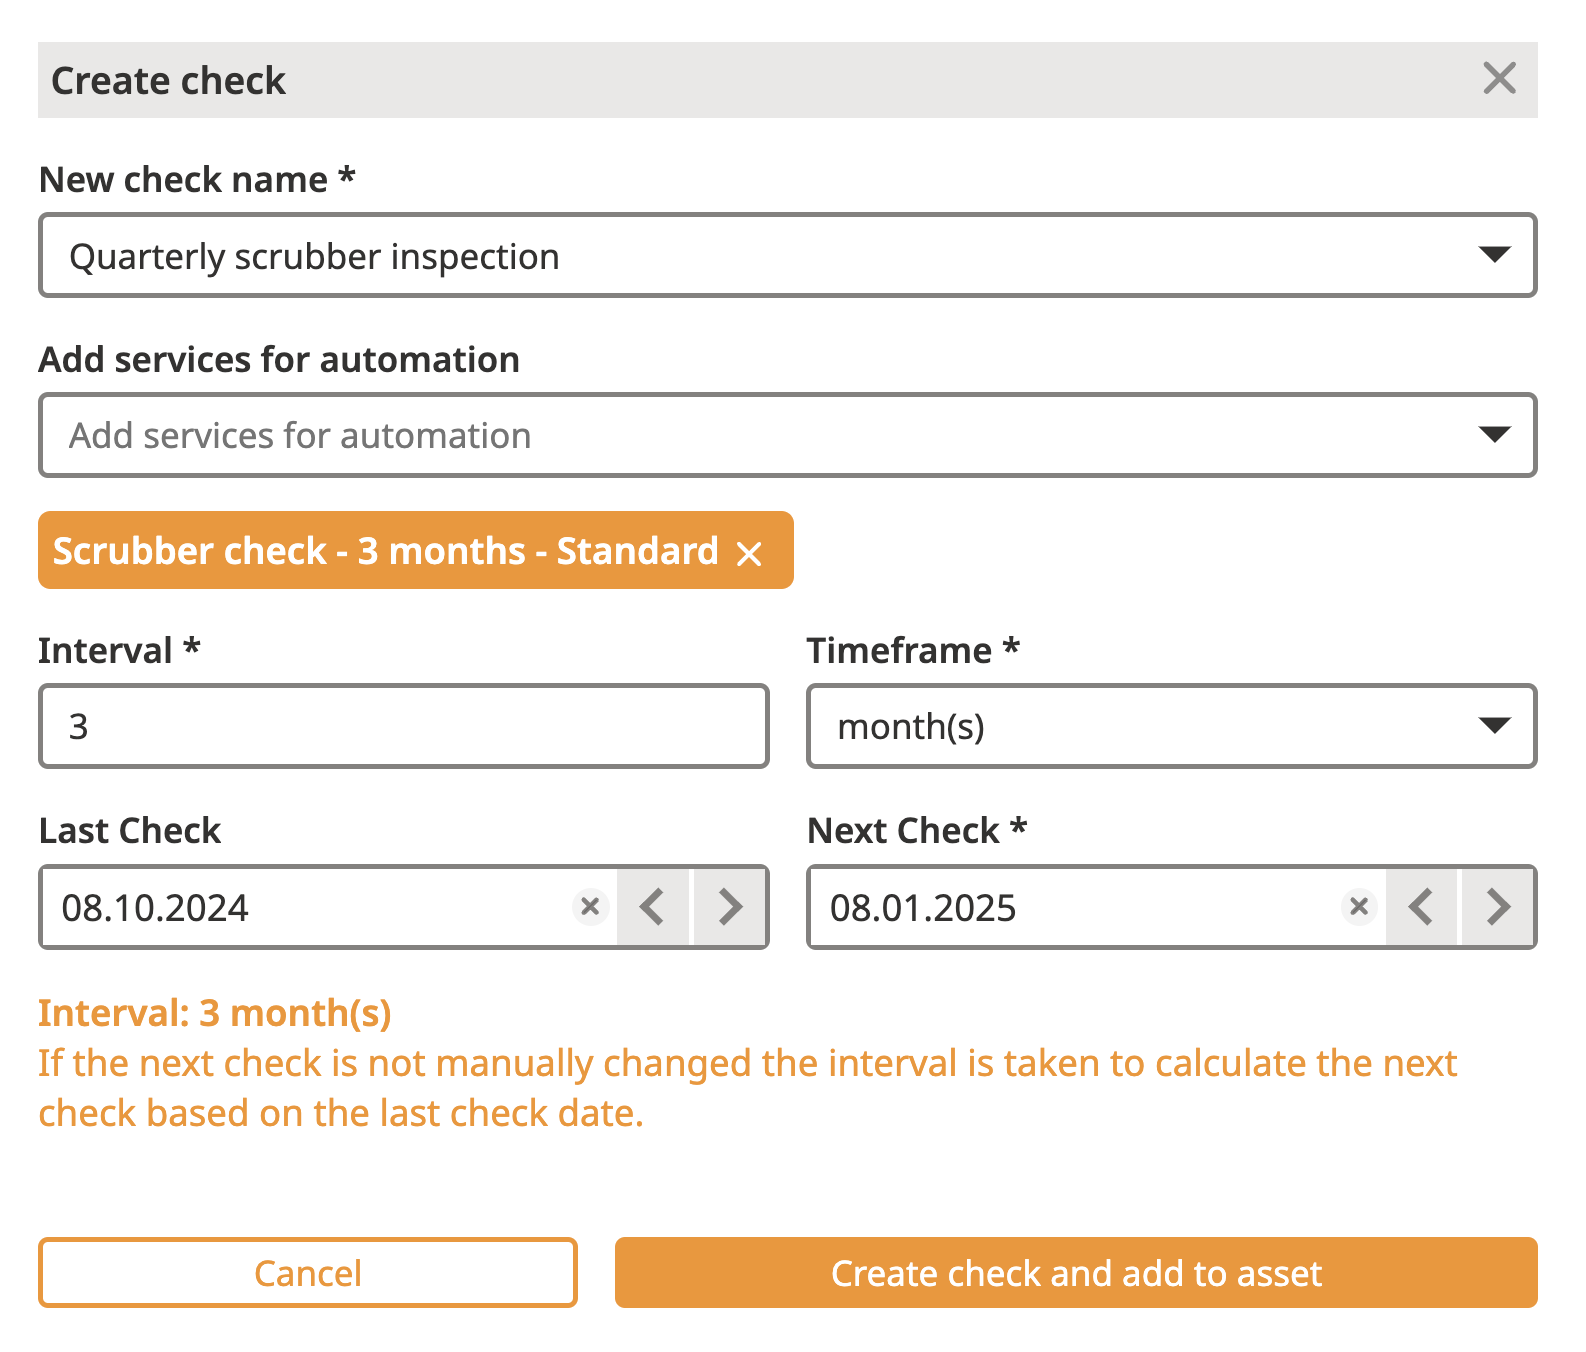
Create an inspection by giving it a name
"Quarterly scrubber inspection" in the example below
Select the service that should complete the inspection in the platform
"Scrubber check - 3 months" from the Service Package "Standard"
Select the Interval of inspection as well as its last occurrence
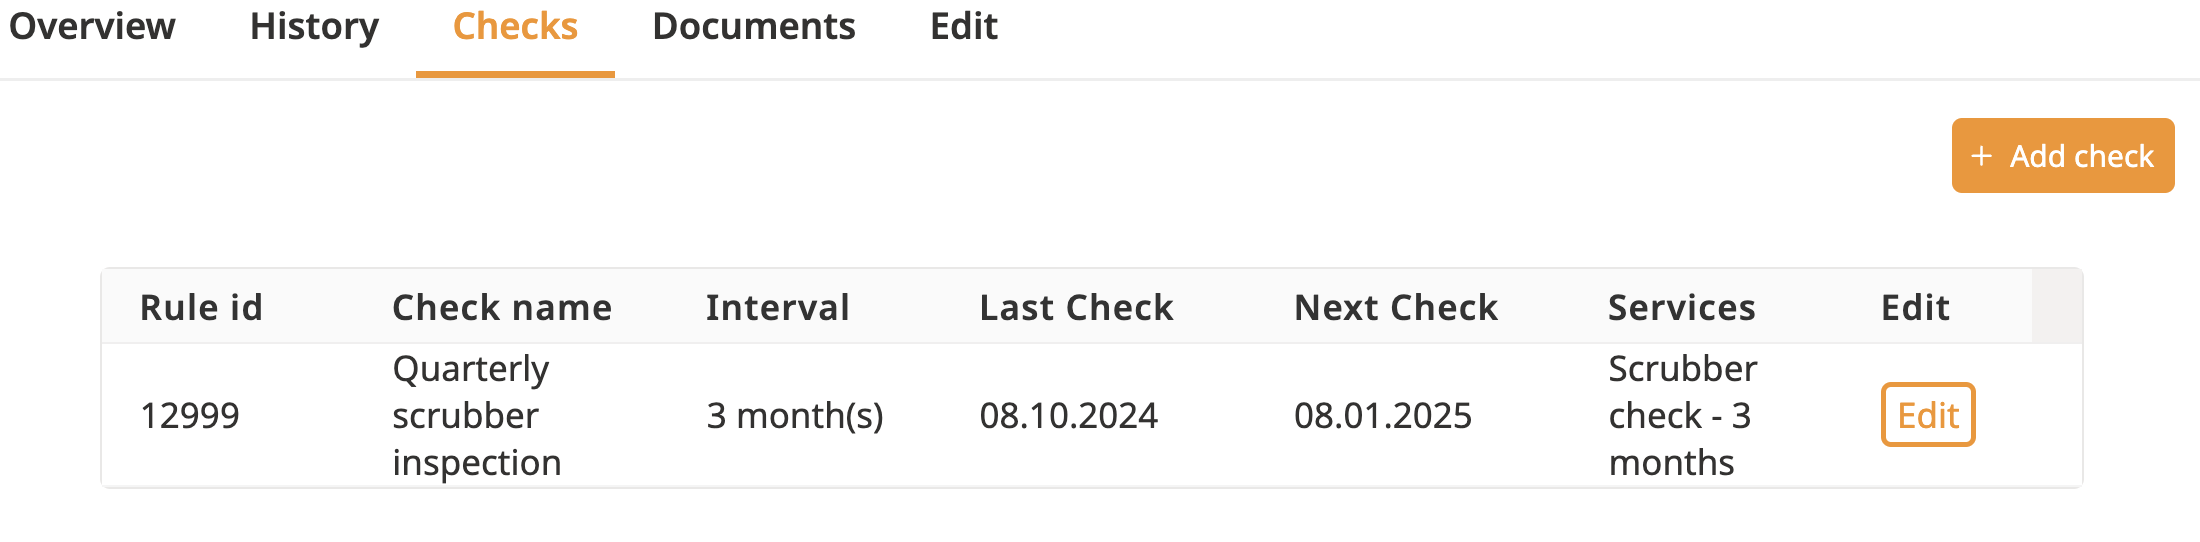
Once you clicked on "Create check and add to asset", the check will now appear in the asset check overview.
Now that this check has been created, it will be much quicker to add it to other assets.
I invite you to read the following article explaining step by step how it is working.
If the process is quite easy, it can be long to do it for 200 assets.
Thankfully, there is a way to duplicate quickly this inspection to multiple assets:
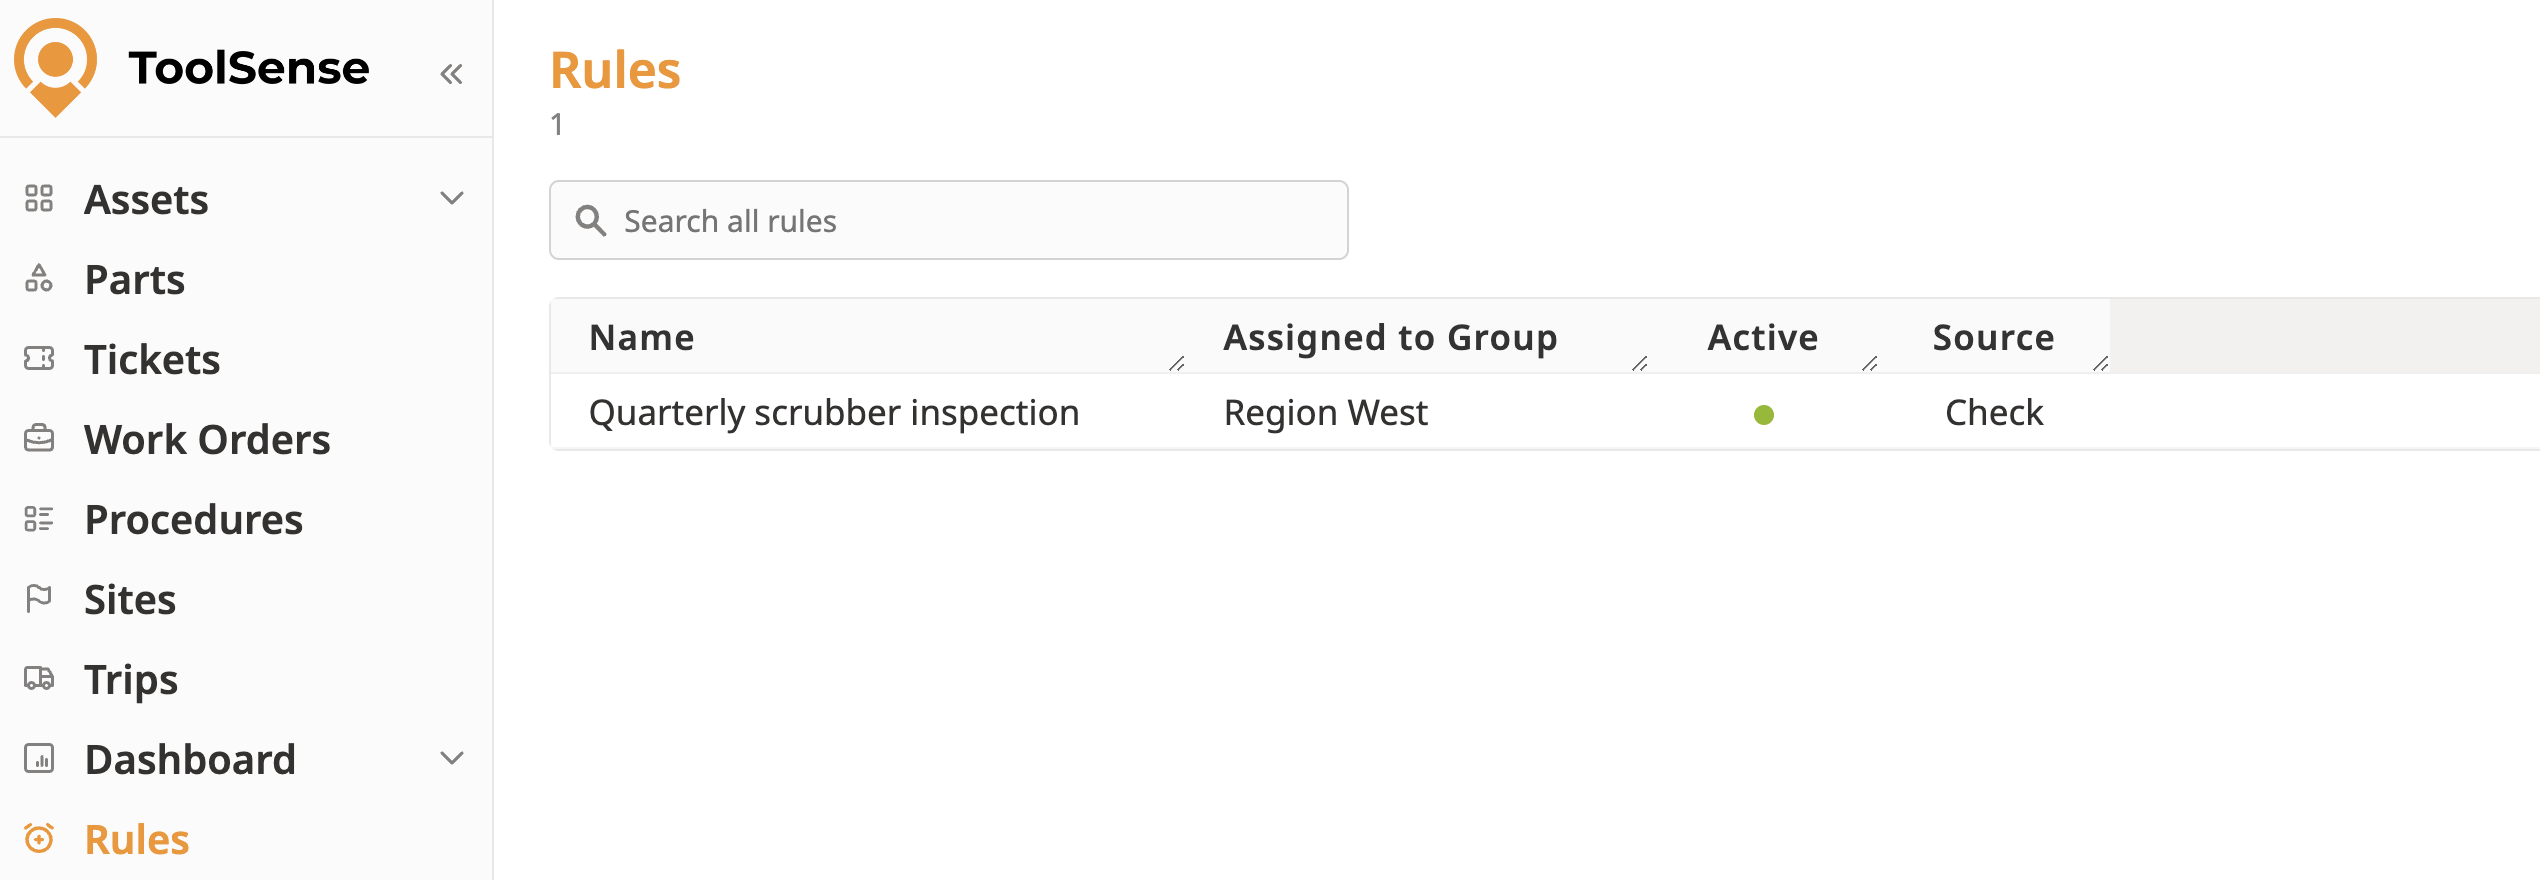
To access it, go to the page "Rules" on the left side of your screen
As you can see, the inspection we created previously appears there.
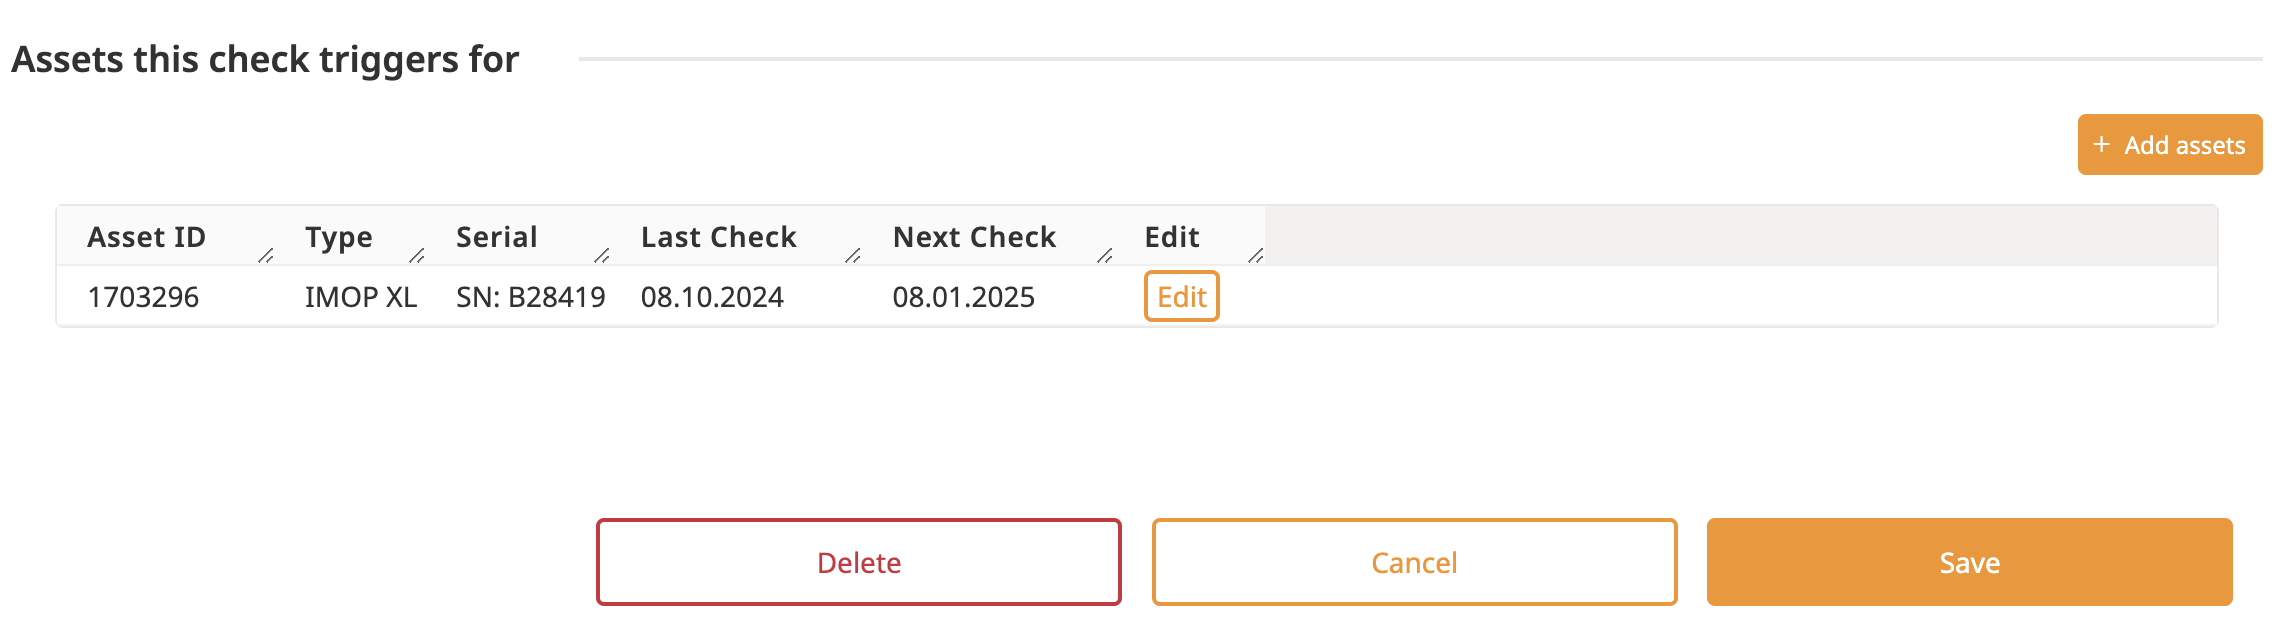
We can now click on this inspection and select all the assets for which this inspection should be set up, by clicking on "Add assets"
Another panel appears, in which you can:
Select another asset
Add the last occurrence of the check
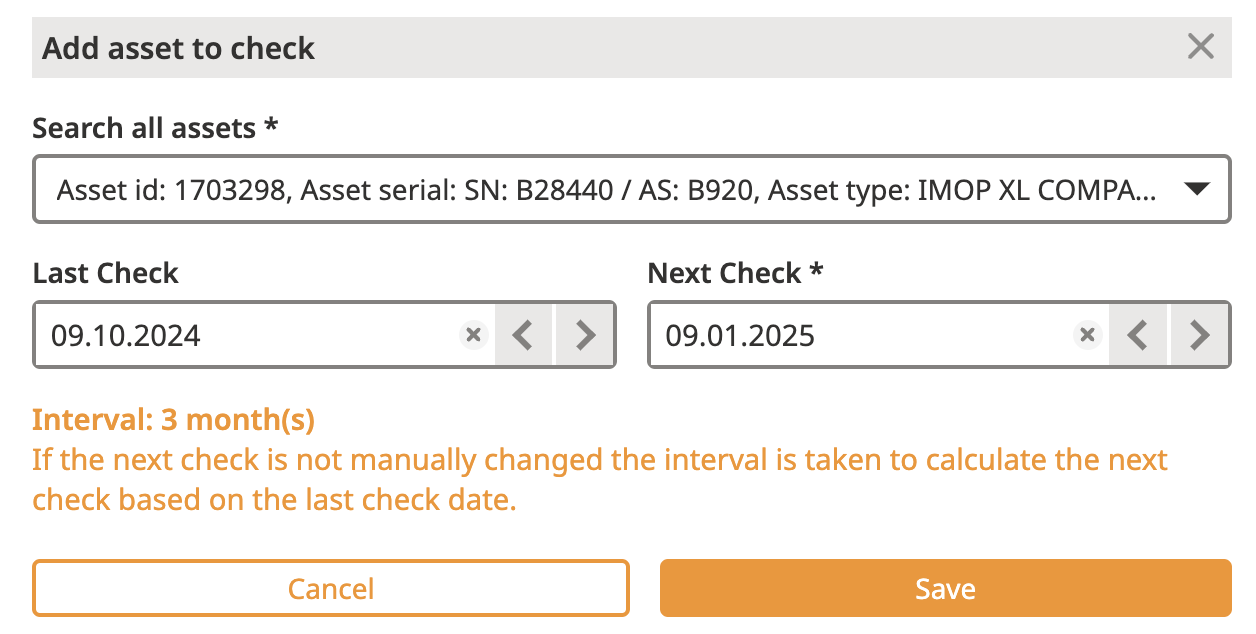
You can repeat this operation very quickly by selecting all the assets of your choice (you can search for the asset type / category, which makes it very easy to find all assets for which this rule should apply).
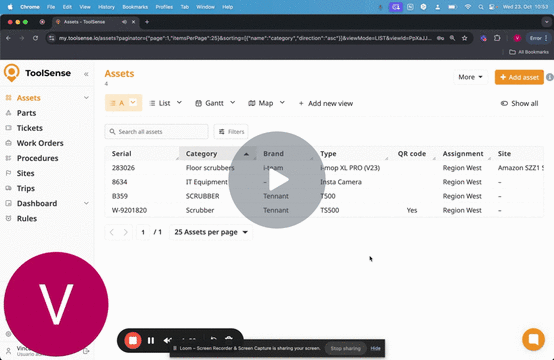
I recorded a video to show you the whole process to set up a Check